How to use the telnet command in Linux
Telnet (short for teletype network) is a command-line tool that facilitates remote communication and network testing. It was widely used for managing servers and devices, but its lack of encryption raised security concerns in modern environments, leading to its decline in favor of alternatives, like secure shell (SSH).
Nowadays, telnet remains a valuable utility for testing network services, debugging connectivity issues, analyzing server responses, and learning about network protocols.
In this article, we’ll cover everything you need to know about using telnet in Linux, including its installation, basic syntax and options, modern use cases, and important security considerations. By the end of this guide, you’ll be able to use this versatile networking tool in controlled environments.
Prerequisites
Before using telnet in Linux, prepare two machines: one as the telnet client and the other as the target system.
You can use two Linux desktop computers, one desktop and one virtual private server (VPS), or, as in this tutorial, two VPS setups from Hostinger. If you choose the latter, select any plan that suits your needs. Since we’re only practicing telnet commands, the most basic plan, KVM 1, will suffice for both servers.
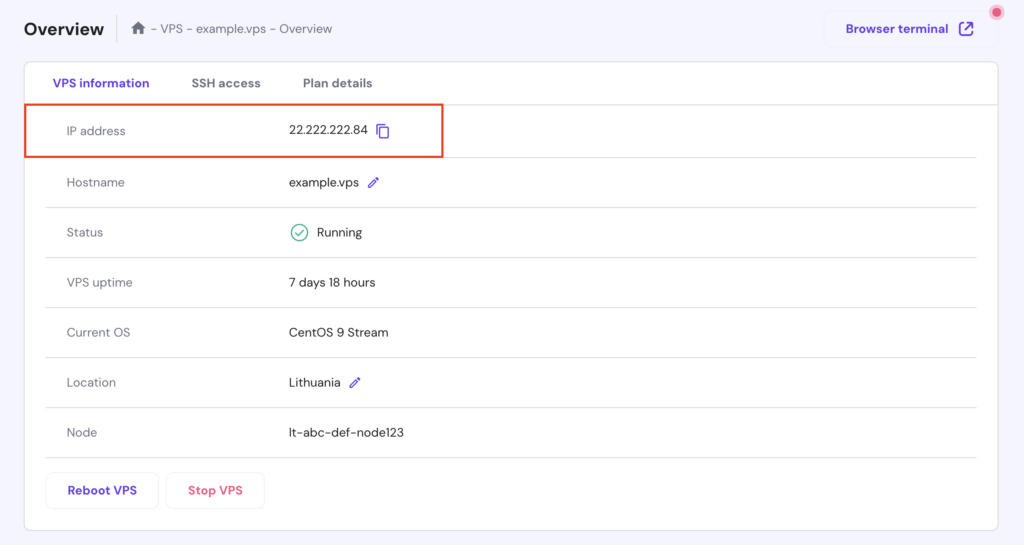
Next, make sure you have authorization for the target machine and know its IP address. If you’re a Hostinger VPS user, you can find your server’s IP in hPanel by going to VPS → Manage → VPS information.
Warning! Accessing unauthorized systems is illegal and unethical. In our case, we can execute commands freely since we own both Linux machines.
Confirm that you have administrative or sudo privileges to install and configure telnet on the client and target system. For Hostinger VPS customers, we grant you full root access so you can modify your server as needed.
Furthermore, prepare terminal software to execute telnet commands on the client machine. You can use Linux’s built-in terminal or third-party software like PuTTY. Alternatively, Hostinger offers a Browser terminal that lets you run commands directly in your browser without installing other apps.
To use this feature, hit the corresponding button in the top-right corner of your VPS dashboard. This will open a new browser tab where you can start executing commands.


How to install telnet on Linux
In this section, we’ll install telnet on the primary client machine and the target remote system. Follow the instructions carefully and make sure you run the commands on the correct machine.
Primary client machine
Here are the steps to install the telnet client on different Linux distributions:
- Update and upgrade the system packages to keep your system up-to-date:
- For Debian-based systems like Ubuntu and Kali Linux:
sudo apt update && sudo apt upgrade
- For RHEL-based systems like CentOS and Fedora:
sudo dnf upgrade
- Install the telnet client with one of the following commands:
sudo apt install telnet # Debian-based systems
sudo dnf install telnet # RHEL-based systems
- Verify if the client is successfully installed by typing:
telnet
The installation was successful if it displays the interactive telnet session like this:

Exit the session with:
quit
Target remote system
On the target system, you’ll need to install the telnet server, open its port in the firewall, and create a dedicated user, as telnet doesn’t allow root access by default for security reasons. Follow these steps:
- Update and upgrade your system packages, similar to the client machine:
sudo apt update && sudo apt upgrade # Debian-based systems
sudo dnf upgrade # RHEL-based systems
- Install the telnet server with:
sudo apt install telnetd # Debian-based systems
sudo dnf install telnet-server # RHEL-based systems
- On Debian-based distributions, the telnet server starts automatically. For RHEL-based systems, start and enable the service manually:
sudo systemctl start telnet.socket

sudo systemctl enable telnet.socket
- Verify the service status to make sure it’s indeed running:
systemctl status inetd # Debian-based systems
systemctl status telnet.socket # RHEL-based systems

- Allow the telnet port (23 by default) through the firewall. If you don’t use any firewalls, skip this step. Otherwise, run the commands below based on your distribution:
- For Debian-based systems using Uncomplicated Firewall (UFW):
sudo ufw allow 23/tcp

sudo ufw reload
- For RHEL-based distributions using Firewalld:
sudo firewall-cmd --permanent --add-port=23/tcp

sudo firewall-cmd --reload
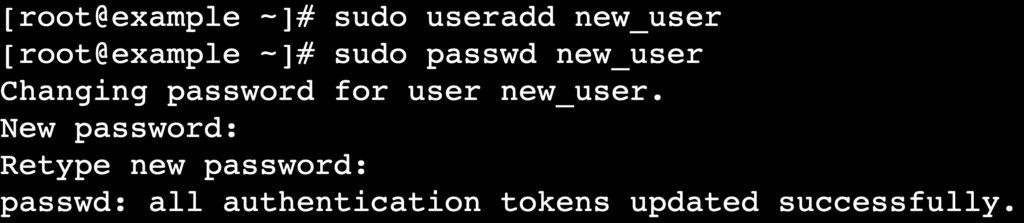
- Create a new user specifically for telnet, replacing new_user with your preferred username:
sudo useradd new_user
- Set a password for the user by running:
sudo passwd new_user
You’ll be prompted to enter and confirm the password.
Uninstalling telnet
If you no longer need telnet on your system, uninstall it with:
sudo apt remove telnet telnetd # Debian-based systems
sudo dnf remove telnet telnet-server # RHEL-based systems
Basic telnet command syntax and options
The basic syntax of telnet is as follows:
telnet [options] [remote_server_ip] [port]
- telnet – the command to invoke telnet.
- [options] – optional; flags that modify the behavior of the telnet command.
- [remote_server_ip] – the remote machine’s IP address you want to access.
- [port] – optional; the port number to connect to. If not specified, telnet uses the default port 23.
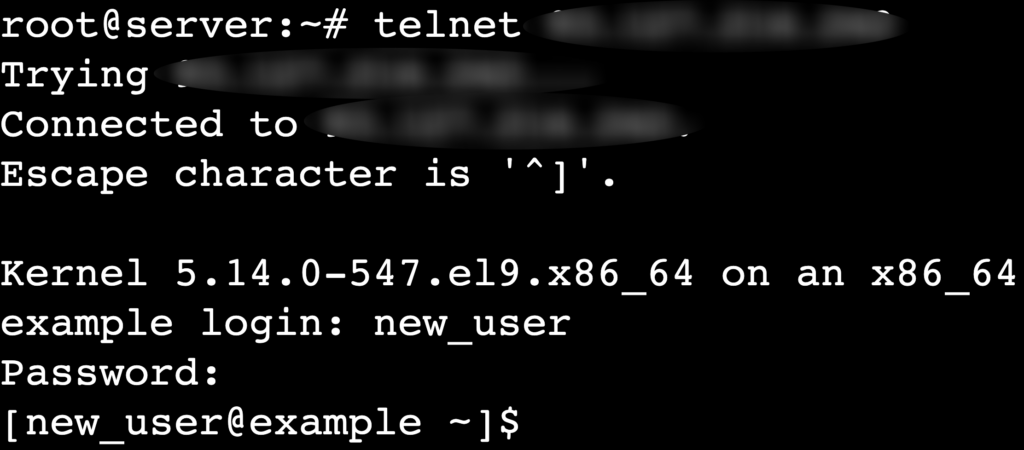
When executed, the command will establish a connection to the specified server. You’ll be prompted to enter the username and password you previously created for telnet:
Like many Linux commands such as ssh, scp, and ftp, you can append options to the telnet command to customize its behavior. Below are the most commonly used options and their purposes:
| Option | Purpose |
| -4 | Forces the use of IPv4. |
| -6 | Forces the use of IPv6. |
| -a | Attempts automatic authentication based on the local username. |
| -b | Specifies the local IP address to bind before making a connection. |
| -c | Disables reading of the user’s .telnetrc file. |
| -d | Enables debug mode to display detailed diagnostic information. |
| -e char | Sets the escape character for the telnet session. |
| -E | Disables the escape character, treating all input as literal. |
| -k | Sends the specified Kerberos principal during authentication. |
| -l user | Specifies the username for automatic login. |
| -n file | Logs the session into a specified file. |
| -x | Enables encryption for the session if supported. |
| -X | Disables the TELNET STARTTLS option. |
| -? | Displays the help menu for telnet. |
| -V | Displays the version of the telnet client. |
For instance, if you have multiple telnet users and want to specify one initially, you can run the command below. Replace user and remote_server_ip with your actual credentials:
telnet -l user remote_server_ip
After successfully logging into the remote machine, you can interact with its shell as if it were your primary server.
If you want to exit the session, simply type:
logout
You’ll be disconnected from the telnet session.

You can also enter the interactive session, as we did earlier to test if telnet was correctly installed, by typing telnet without any arguments:
telnet
Practical telnet examples
Here are some safe examples of using telnet in modern environments, from examining mail servers to troubleshooting custom port issues.
Testing SMTP servers
Telnet can help diagnose Simple Mail Transfer Protocol (SMTP) server issues and verify configurations. The process typically involves testing whether the server accepts connections, processes commands correctly, and handles email transmissions.
To connect to an SMTP server using telnet, follow these steps:
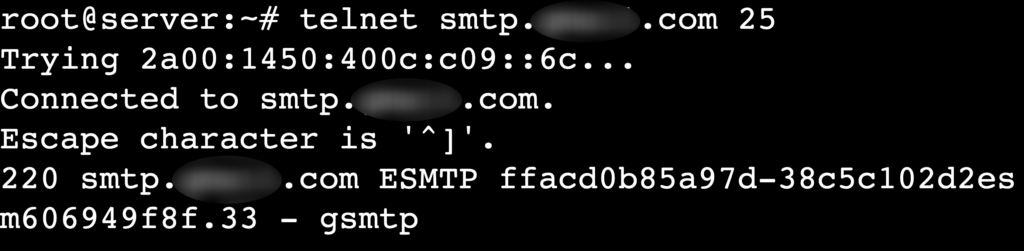
- Run the following command to initiate a connection. Replace smtp.example.tld with your SMTP server’s details:
telnet smtp.example.tld 25
If the connection is successful, you’ll see a welcome message from the mail server, similar to:
- Introduce yourself to the SMTP server using the domain you are connecting from. Replace domain.tld with your actual address:
HELO domain.tld

- Enter the following command to define the email sender:
MAIL FROM:<mail_sender@domain.tld>
- Do the same for the email recipient:
RCPT TO:<mail_recipient@domain.tld>
- To input the email content, type:
DATA
- The server will prompt you to enter the email body. Type your message and finish by entering a single period (.) on a new line to indicate the end of the message:
Subject: Test Email

This is a test email sent using telnet.

.
The server should confirm the message has been queued.
- Once you’ve completed your testing, exit the session by typing:
QUIT

Suggested reading
There are several SMTP ports you can use: 25, 465, 587, and 2525. Learn their differences and how to choose the right one for your needs.
Assessing POP3 servers
Besides testing SMTP servers, telnet also proves handy for checking Post Office Protocol 3 (POP3) servers. Using this method, you can authenticate and interact with your inbox to troubleshoot email retrieval issues.
The guide to testing a POP3 server is as follows:
- Type the command below, replacing pop.example.tld with your actual POP3 server’s hostname:
telnet pop.example.tld 110

- Enter your complete email address or simply the domain. In some cases, you may need to test both to see which one works:
USER address@domain.tld

USER domain.tld
- Once the server responds with +OK, enter your email password to log in:
PASS your_password
If successful, you should see:

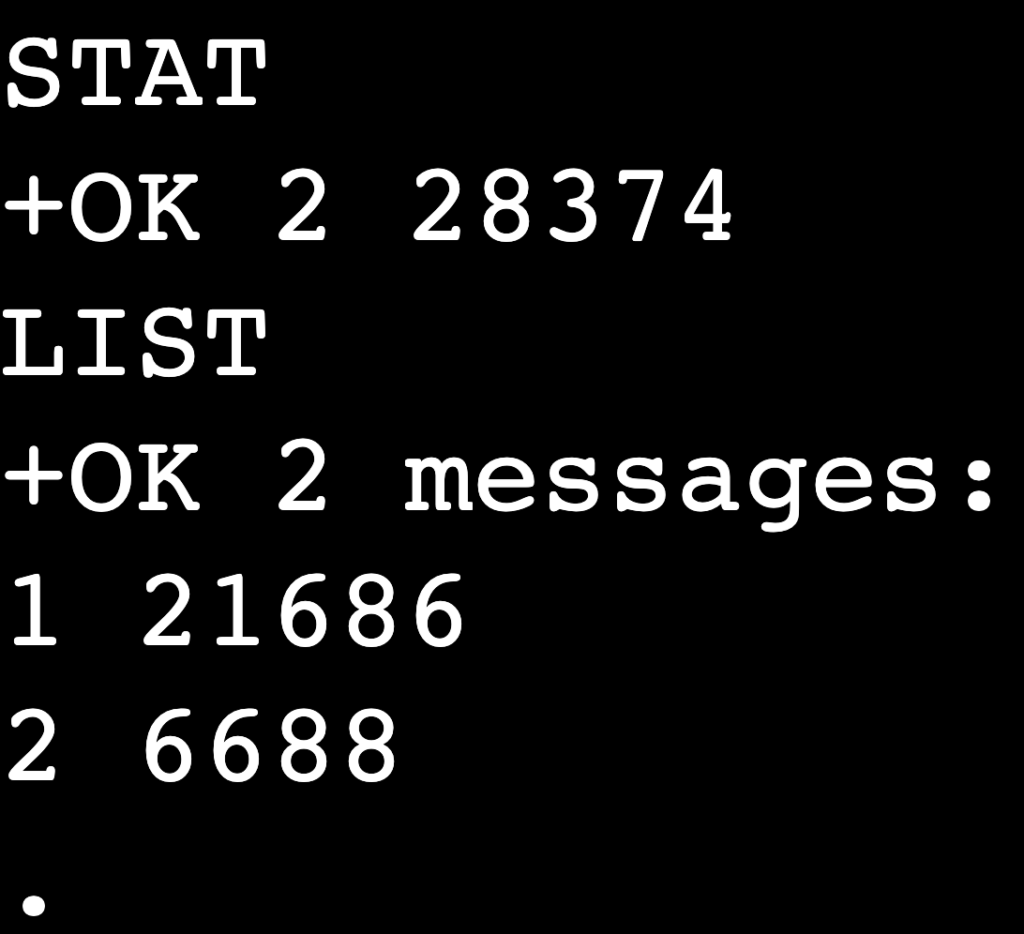
- Try viewing the total number of emails in your inbox:
STAT
- To list all emails with their IDs and sizes:
LIST
- You can also retrieve the content of an email. Replace id with the email’s unique ID number:
RETR id
- After verifying the server’s functionality, don’t forget to exit telnet. Type:
QUIT
Debugging HTTP servers
You can use telnet to debug HyperText Transfer Protocol (HTTP) servers by connecting to them on port 80, the default port for HTTP traffic. This approach lets you manually send requests and check if the server responds correctly.
If your remote machine has an HTTP server, here’s how to debug it:
- Connect to the remote server by executing:
telnet remote_server_ip 80
- Type the following HTTP GET request to retrieve the server’s default page. Replace domain.tld with the domain that points to the server:
GET / HTTP/1.1

Host: domain.tld
Make sure to press Enter twice after entering the request.
- The server will respond with the HTTP headers and, in most cases, the content of the requested page. For example:
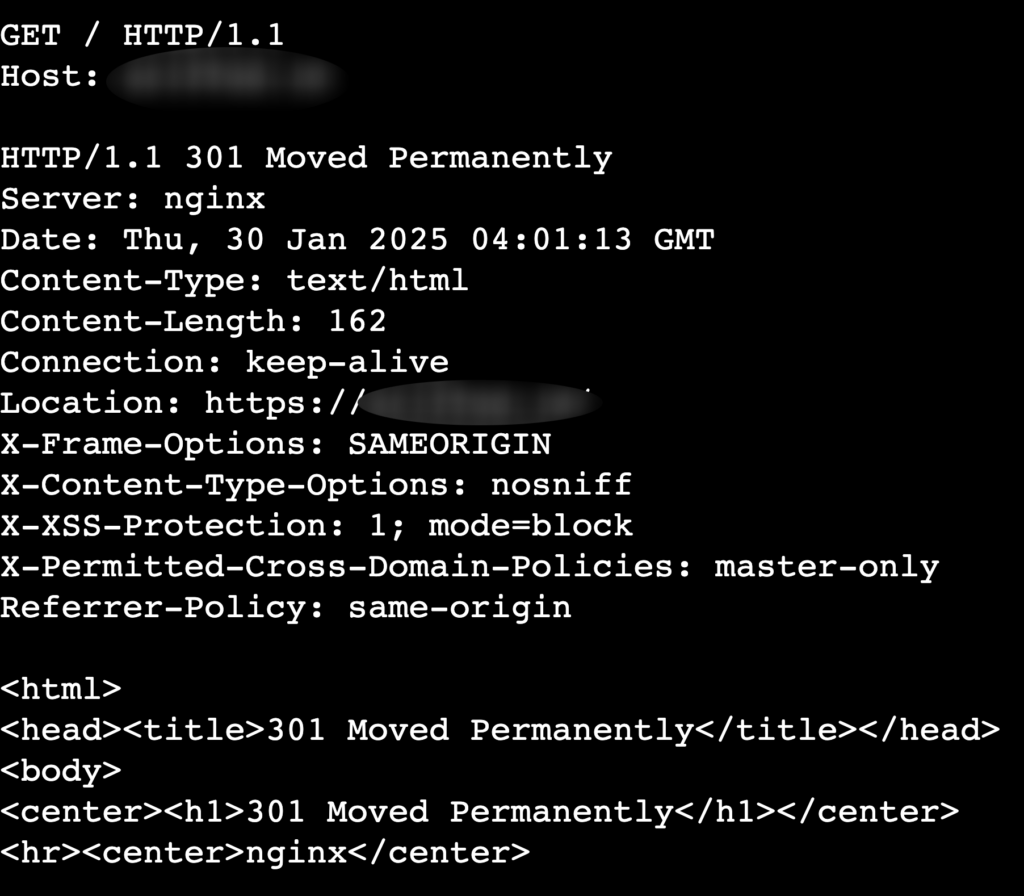
As usual, type quit once you’re done debugging.
Checking FTP servers
Using telnet to test a File Transfer Protocol (FTP) server is a quick way to verify if it’s operating correctly and if the default port 21 is not blocked. Please note that this is for testing purposes only. When transferring files, always use more secure protocols like FTPS or SFTP.
Here are the instructions to check your FTP server:
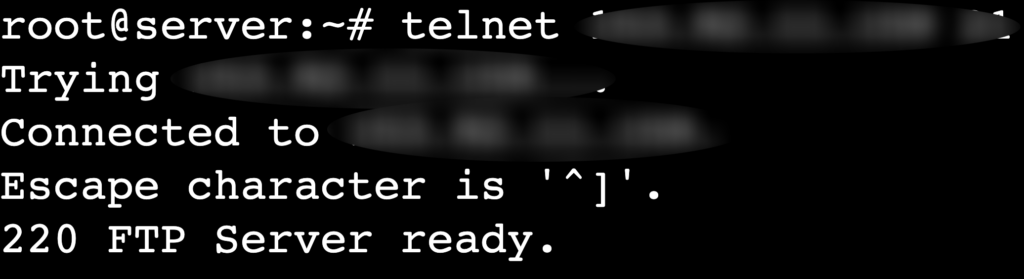
- Use this command to access the server, replacing remote_server_ip with your actual server details:
telnet remote_server_ip 21
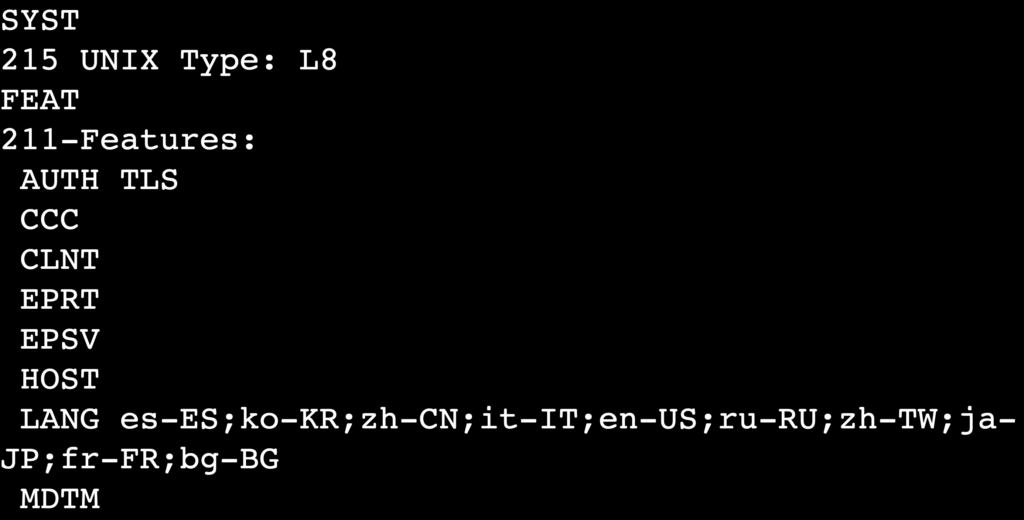
- You can manually send basic FTP commands to check the server’s functionality. For instance, to check the server type and version:
SYST
- Or, to verify your FTP server’s supported features:
FEAT
Interacting with IRC servers
Internet Relay Chat (IRC) is a protocol for real-time text communication used for group chats and discussions. While modern messaging platforms have largely replaced it, you can still connect to an IRC server using telnet to test its availability and interact with it.
Keep in mind that IRC is a plain-text protocol, so avoid sharing sensitive information over it. Follow these steps to connect to an IRC server with telnet:
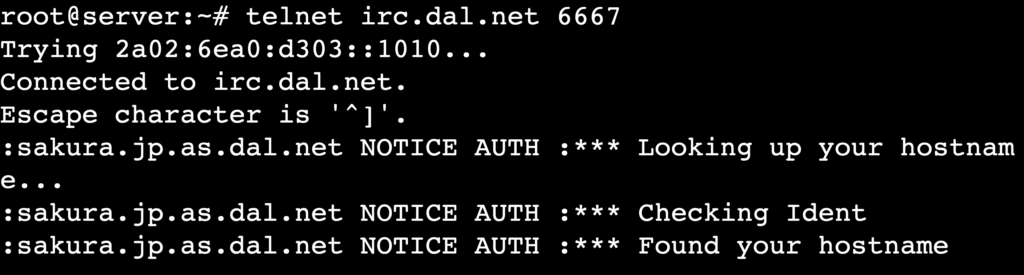
- Use the following command to connect to your desired IRC server on its default port, 6667:
telnet irc.domain.tld 6667
- After the server welcomes you, send a NICK command to define your nickname:
NICK your_nickname
- Set your username and provide a personal identifier:
USER your_username 0 * :Your Full Name

- Use the JOIN command to enter an IRC channel. Replace #channel_name with the channel name you want to join:
JOIN #channel_name
If successful, you’ll receive messages from the channel, including a list of users currently in the chat:

- To send a message to the channel, use:
PRIVMSG #channel_name :Your message here
- When finished, leave the server by typing:
QUIT :Goodbye message
Examining custom ports
Last but not least, telnet lets you test connectivity to any open port, making it especially useful if you have non-standard services running on custom ports or if you’ve changed a service’s default port to a custom one, such as switching SSH from port 22 to another.
Here’s how to do so:
- Specify the remote server’s IP address and the port you want to test:
telnet remote_server_ip port
You’ll receive a response if the port is open and the service is running. Otherwise, telnet will display an error message:

- Depending on the service running on the custom port, send appropriate commands to interact with it. For example, if it’s a custom-built application, you might use the command below, replacing /custom_endpoint with the path defined by your service:
GET /custom_endpoint HTTP/1.1

Host: remote_server_ip
Depending on the application, the service will respond with data specific to the custom port, such as headers, messages, or even error codes.
Security considerations for using the telnet command
Telnet was historically used for remote connections and network administration. However, all data, including sensitive information like usernames and passwords, is transmitted in plaintext. This makes it highly vulnerable to interception by attackers, especially on public or untrusted networks.
Due to these risks, you should only run telnet in controlled or local environments for basic debugging tasks, such as testing open ports or verifying SMTP communication.
For secure remote server communications, it’s better to use SSH, as this protocol encrypts all data in transit, protecting your information from potential eavesdropping.
If you need to test secure protocols or encrypted services, consider safer alternatives like openssl or Netcat (nc). These tools let you securely debug and test network connections, which are ideal for sensitive applications.
Conclusion
In this article, we’ve covered how to use the telnet command to test services like SMTP, POP3, HTTP servers, and specified ports. This shows how telnet remains useful for troubleshooting network issues in a controlled or local Linux environment.
However, due to its lack of encryption, you should use the telnet protocol responsibly and only for non-sensitive tasks. We recommend SSH, openssl, or nc for secure remote connections or encrypted service assessments.
By acknowledging telnet’s strengths and risks, you can use it effectively for specific scenarios while prioritizing secure alternatives for critical applications. Also, make sure you have proper authorization before using telnet to access remote servers or services.
If you have any questions about telnet or want to share how you use it, feel free to use the comment box below.
Linux telnet command FAQ
What is the telnet command used in Linux?
The telnet command in Linux is used for testing and troubleshooting network services by establishing a plain-text connection to a remote host. It helps verify if specific ports are open and whether services like SMTP, HTTP, and POP3 are responding as expected.
How is telnet different from SSH?
Telnet transmits data in plaintext, making it insecure, while SSH encrypts all communication to ensure data security. Telnet is usually used for basic debugging in controlled environments, whereas SSH is the preferred tool for secure remote server access and system administration.
Can I use telnet to test a secure server?
No, telnet can’t test secure servers because it doesn’t support encrypted connections. Instead, use tools like openssl or nc to test servers running secure protocols, such as HTTPS or SMTPS, which require encryption.

Ariffud is a Technical Content Writer with an educational background in Informatics. He has extensive expertise in Linux and VPS, authoring over 200 articles on server management and web development. Follow him on LinkedIn.