Thunderbird Email Setup: Automatic and Manual Methods

Using a mail client such as Mozilla Thunderbird is an excellent solution to easily manage multiple email accounts.
Thunderbird is an open-source email application developed by the Mozilla Foundation. It’s also one of the most popular email management platforms alongside Outlook.
With Thunderbird, users can access all of their incoming emails in one folder instead of going to the inbox of each mail account. Additionally, there are many add-on services available for Thunderbird to extend its functionality.
This article will go over the steps of setting up an email account on Thunderbird.
Download website launch checklist
Collecting Email Account Settings
Before proceeding with the Thunderbird setup, you’ll have to collect some email configuration details.
To add a Gmail or similar major email hosting provider account to Thunderbird, you’ll only need the full email address and password as the platform can automatically determine its mail server configuration settings.
These details will be necessary if you wish to add a custom email address to Thunderbird.
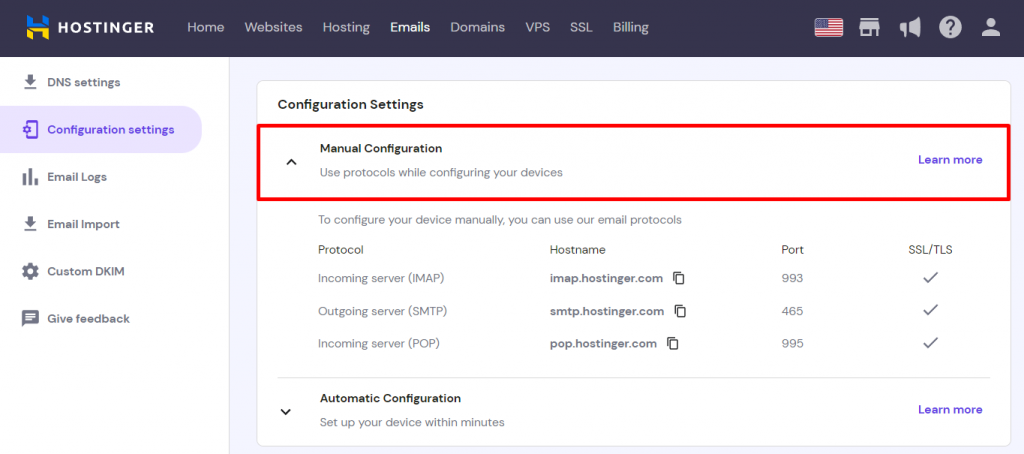
If you use a Hostinger email, you can locate the email IMAP, POP, and SMTP information by logging in to your hosting account and heading to Emails -> Email Accounts.
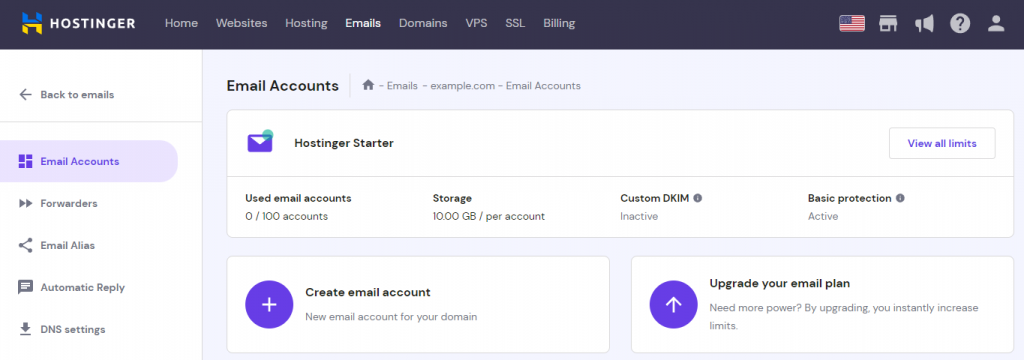
There, select your domain name and navigate to Configuration Settings -> Manual Configuration to see the server names and ports.
Make sure to note the outgoing server and incoming server details – you’ll need them to manually configure the custom email account.
How to Set up Mozilla Thunderbird?
Once you have collected the necessary information, it’s time to set up your email account on Thunderbird. The following tutorial will show you how to do so both automatically and manually.
Let’s start with the automatic account configuration.
Setting up Email in Mozilla Thunderbird Automatically
This method is best for setting up a Gmail account or one from other popular email providers.
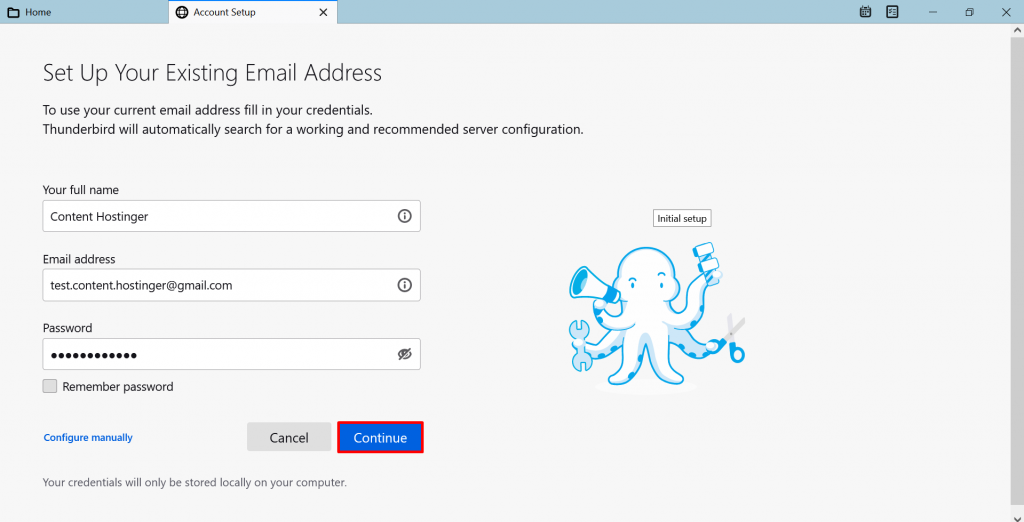
Start by opening Mozilla Thunderbird. If this is the first time you open it after installation, the Set Up Your Existing Email Address page will pop up.
On it, enter your name, full email address, and password. Then, press Continue.
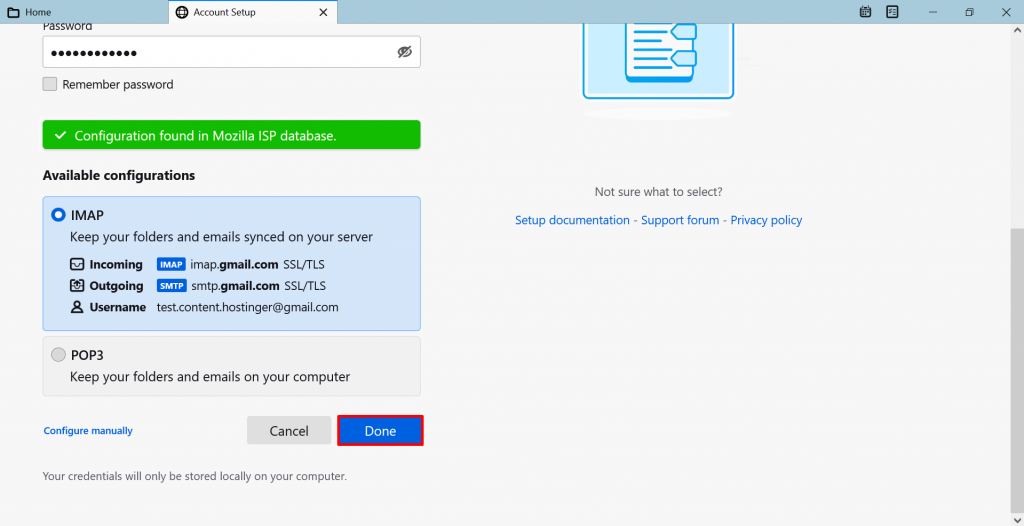
Thunderbird will automatically look up and fill in the email provider’s outgoing and incoming mail server details. It will also give you the option to choose either IMAP or POP as the incoming mail protocol. After making your choice, hit the Done button.
The page below will show up once you’ve successfully configured an email account on Thunderbird.
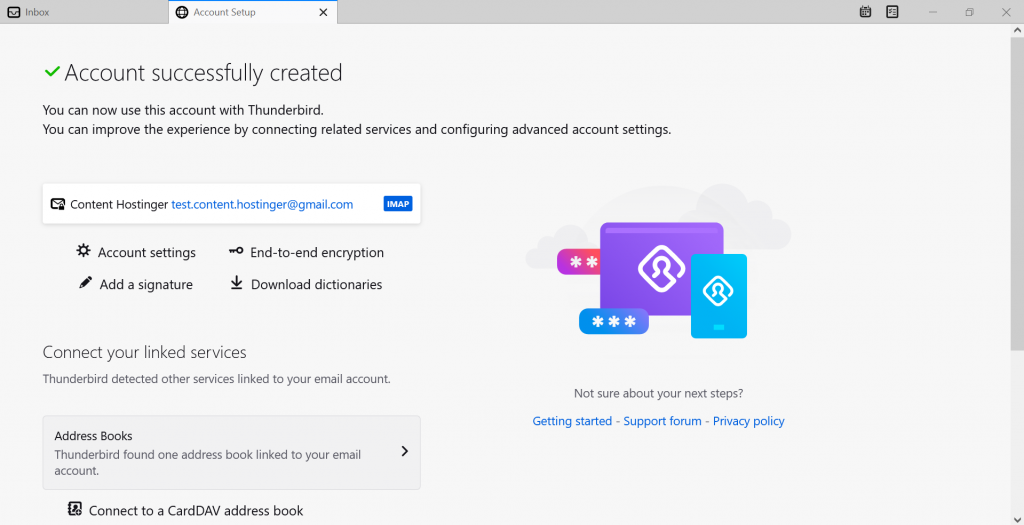
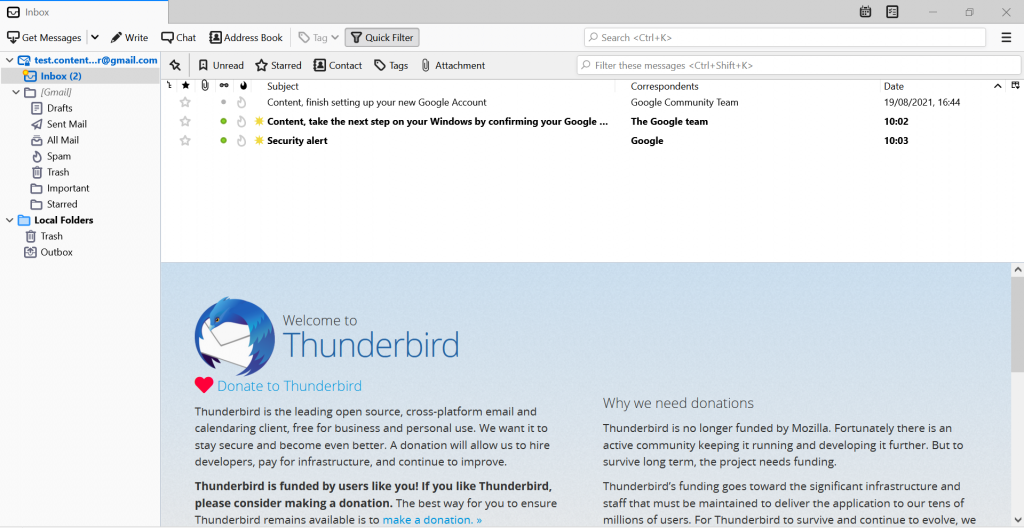
On the same page, click Finish to view your mailbox. Now, you can start using Thunderbird to manage emails. The interface looks like this:
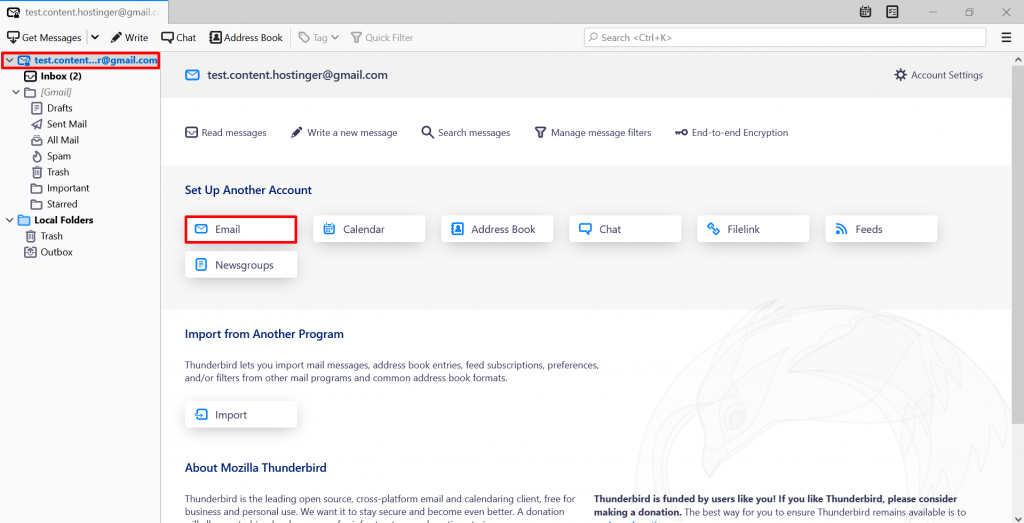
To add a new account, click on your email address on the left pane of the page and click Email in the Set Up Another Account section. Then, follow the same steps as before.
Setting up Email in Mozilla Thunderbird Manually
Manual setup is recommended for users who want to set up a custom email or whose email provider is not listed in Thunderbird’s automatic configuration database.
Manually tweaking the email server settings is also better for their email exchange security.
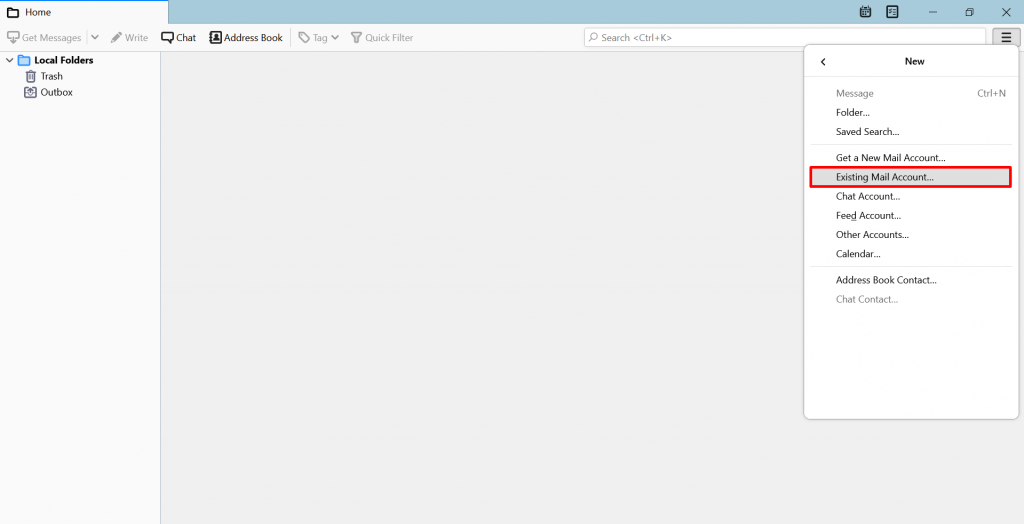
To manually set up a mail account on Thunderbird, open the application and click the hamburger menu button at the top right of the window to access this email client setup page. Then, click New -> Existing Mail Account.
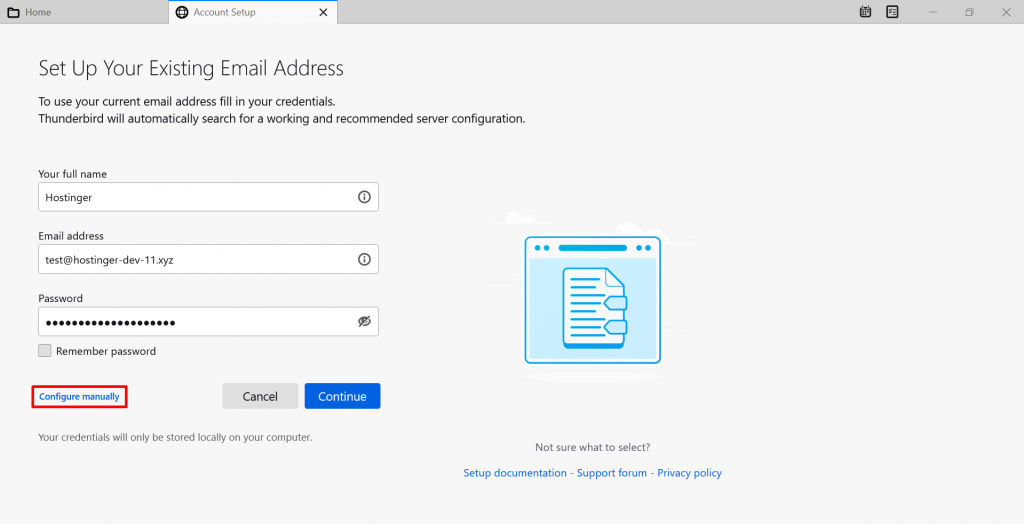
Once the Mozilla Thunderbird settings page appears, fill in your name, full email address, and mailbox password – we’ll be using a Hostinger email in this example. After that, click Configure manually.
The manual configuration options will appear on the same page. Here, edit the server names, ports, and security settings based on the configuration details you’ve collected. Configure any additional account settings as needed.
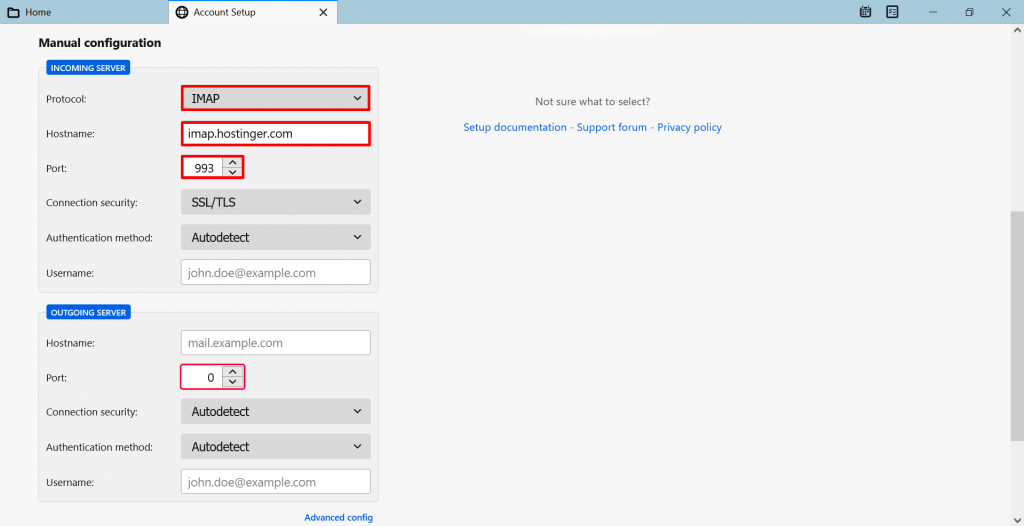
Start by setting up the incoming mail server. In this example, we’ll choose IMAP from the incoming protocol drop-down menu and type in imap.hostinger.com as the incoming server hostname. We’ll also change the incoming port to 993.
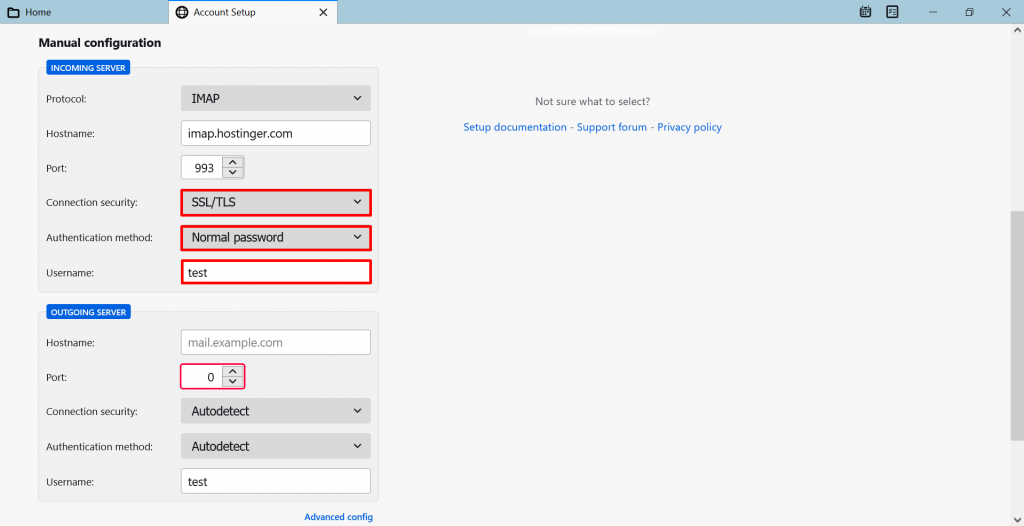
Now, click on the Connection security drop-down menu and select SSL/TLS. For the incoming server authentication method, we recommend picking Normal password.
Fill in the Username field with your email username without the domain extension. For instance, if your email address is admin@yourdomain.com, the username will be admin.
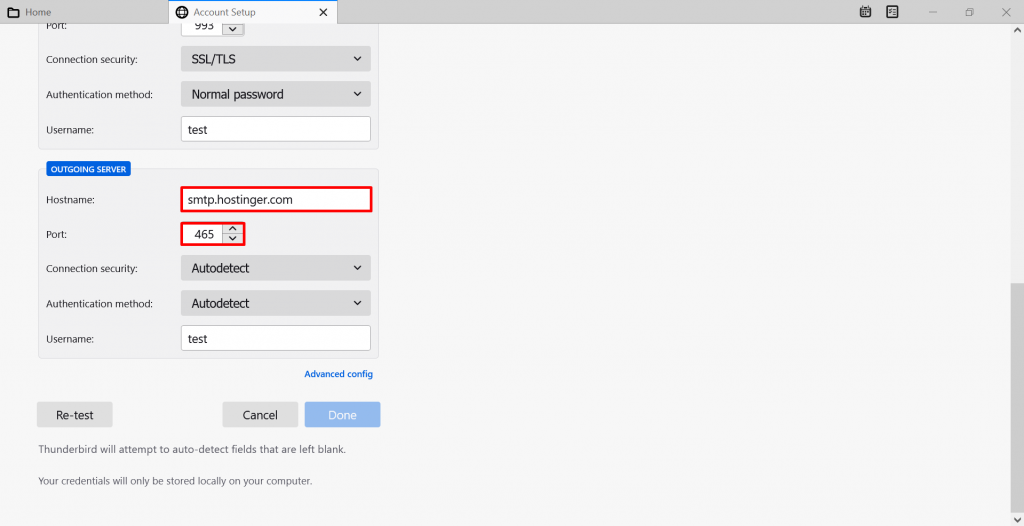
After configuring the incoming port, hostname, username, and other incoming server details, continue to set up the outgoing mail server.
Start by filling in the Hostname and Port fields of your outgoing server – we’ll use smtp.hostinger.com as the outgoing server (SMTP) hostname and 465 as the outgoing port.
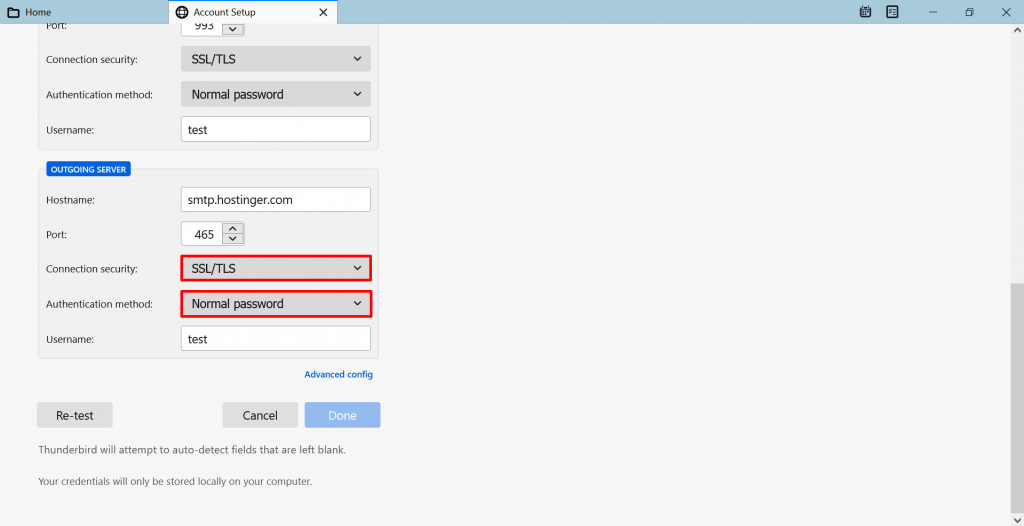
Choose SSL/TLS as the Connection security method. Then, click on the Authentication method drop-down menu and pick your preferred outgoing authentication routine – we recommend using Normal password for this setting, too. You don’t need to fill in the outgoing username as the platform will use the username you entered for incoming mail.
Once you’re done, click the Re-test button to test your manual settings. If the settings are valid, Thunderbird will show a quick response like this:
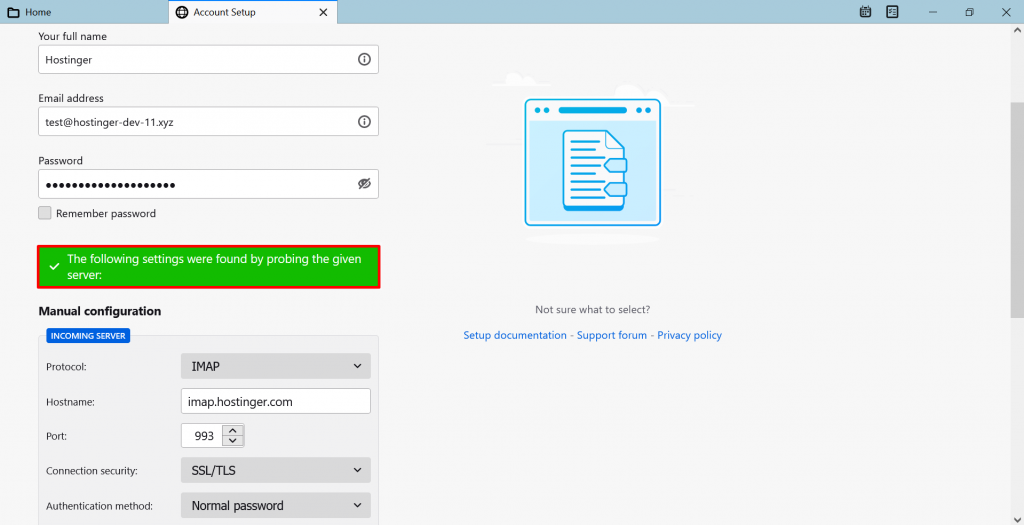
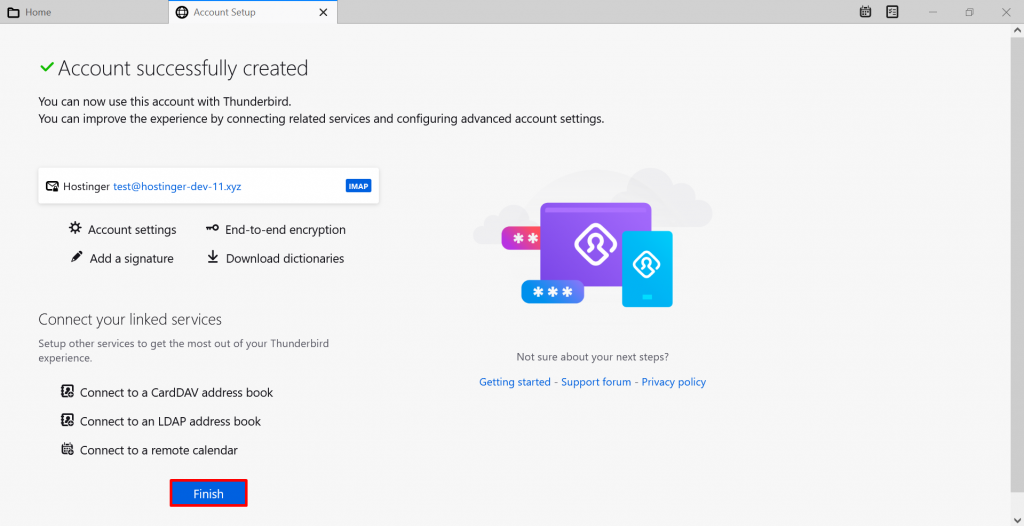
Press Done to finish and wait for Thunderbird to verify the email configuration. A new page will pop up, showing that your account is now connected to Thunderbird. Click Finish to view the mailbox.
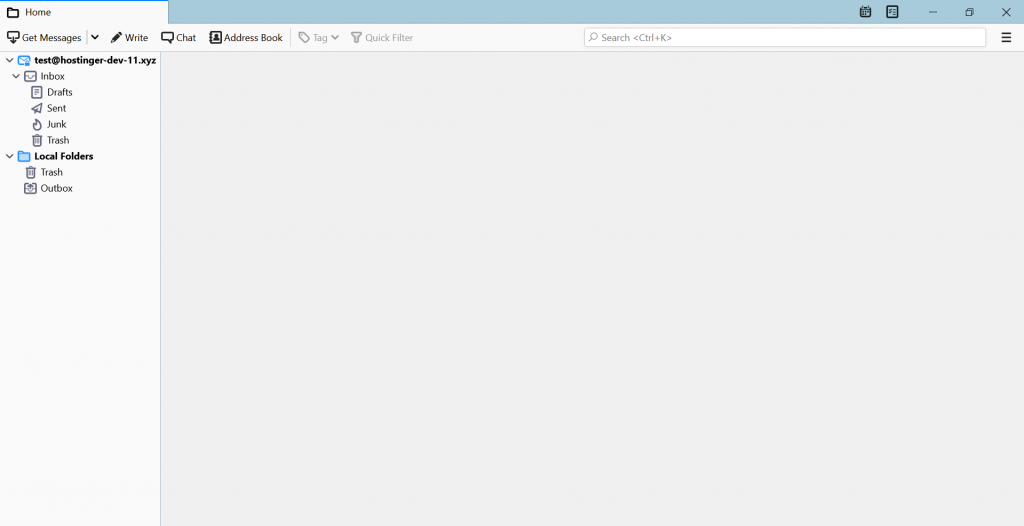
The newly added email account will appear on the left panel of the application window.
To learn more about additional settings to personalize this email client, visit Thunderbird’s official support site.
Conclusion
Thunderbird helps to keep your inboxes neat and organized. Plus, it’s possible to customize this platform to suit your needs.
By default, Thunderbird will automatically take care of most of the mail configuration – users only need to provide their name, email address, and password.
If you use a custom email address or your email provider is not listed in Thunderbird’s database, you’ll need to manually set up the mail account.
Let’s recap the two ways to set up an account on Thunderbird:
- Automatic configuration – open the Thunderbird app and enter your full name, email address, and password. Wait until the platform sets up the email provider’s incoming and outgoing servers. Then, you can go ahead and configure any additional account settings.
- Manual configuration – access Thunderbird, enter your mail login details, and choose to set up the mail account manually. Then, input the incoming and outgoing server settings.
We hope you found this article helpful. If you have any questions, leave them in the comments section below.


Comments
December 04 2020
Hi. Can HOSTINGER use POP3 or will it always use IMAP, even although my THUNDERBIRD will use POP3 ? And will this be all OK ?
February 09 2021
Hi, Robert! You can use POP3 connection with Hostinger. However, you should take into consideration the difference between POP3 and IMAP and find which fits your needs best. If you use POP3 connection on Thunderbird, that email will be removed from your server on Hostinger's side. That means if you then remove the email from Thunderbird, it would not be possible to recover it. You can check our in depth article about IMAP and POP3 here.