How to create a budget-tracking web app without a single line of code

Managing finances is challenging these days, especially with so many ways to pay – from e-wallets and online banking to tap-to-pay. While convenient, they make it easy to lose track of where our money goes.
After trying several budget-tracking apps, none of them worked for me. I needed a simpler way to manage my spending and savings in one place.
So, I built my own budget-tracking app using Hostinger Horizons. Read on to see how I did it despite having little to no coding knowledge.
Why use Hostinger Horizons?
While I’m familiar with basic web development languages like HTML, CSS, or PHP, a web app is more than just a static website.
Building a web app requires advanced frameworks, with which I have no experience at all. I’m also not a UI/UX expert and have never used design tools like Figma to build a complete project.
But, with Hostinger Horizons, I could build a web app with simple prompts without writing any code or web development experience.
All I had to do was describe the web app I wanted to create, and Hostinger Horizons handled the technical aspects, including the code and framework.
Hostinger Horizons offers various plans starting at RM86.99/month with a 30-day money-back guarantee. The starter plan includes 100 message credits and a month of hosting. So, you can build, deploy, and connect a custom domain to your web app all in one place.
Planning and figuring out the basics
Before building my web app, I planned everything to keep the process efficient. Here’s what I did:
Outlining what I needed the app to do
I started by brainstorming the features that could help me better understand my financial activity and avoid overspending:
- Expense tracking – I categorized expenses by common types like bills, shopping, transportation, and entertainment.
- Income tracking – I organized my income based on their sources, such as salary, bonuses, and interests.
- Budgeting – I wanted to set budgets for each expense category to keep my spending in check.
- Savings goals – I wanted a way to see how much I should save to reach my goal and visualize my progress.
- Transaction history – I needed a detailed record of all my transactions, including the date, amount, category, and any notes I added.
Visualizing the user experience
Next, I thought about how to make the app more visually engaging and user-friendly. I also wanted it to be something I enjoy using, so I added some personal touch:
- Overview dashboard – I wanted a clean dashboard that gave me a quick overview of my income, expenses, budget progress, and savings goals.
- Spending status – I wanted an indicator of my overall spending to show if I was on track, almost over budget, or over budget.
- Progress bars – To make tracking my budget easier, I added progress bars in different colors for each expense category.
- Transaction grouping by date – My transactions should be grouped by date. I should also be able to add a new transaction from the past and edit entries if needed.
- Buttons for easy actions – To make the app more user-friendly, I wanted to add separate buttons for income, expenses, and savings goals.
How I built a personal budget-tracking web app with Hostinger Horizons
Now, I will walk you through step-by-step how I created my budget-tracking web app using Hostinger Horizons.
1. Accessing Hostinger Horizons
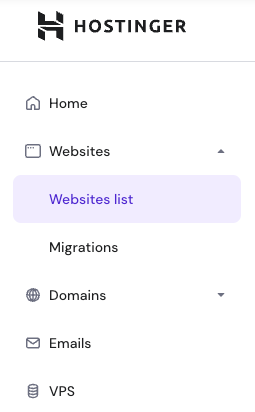
After purchasing a Hostinger Horizons plan, I went to the hPanel dashboard and clicked Websites → Websites list in the left sidebar.
I clicked on the Add website button and then chose Hostinger Horizons.
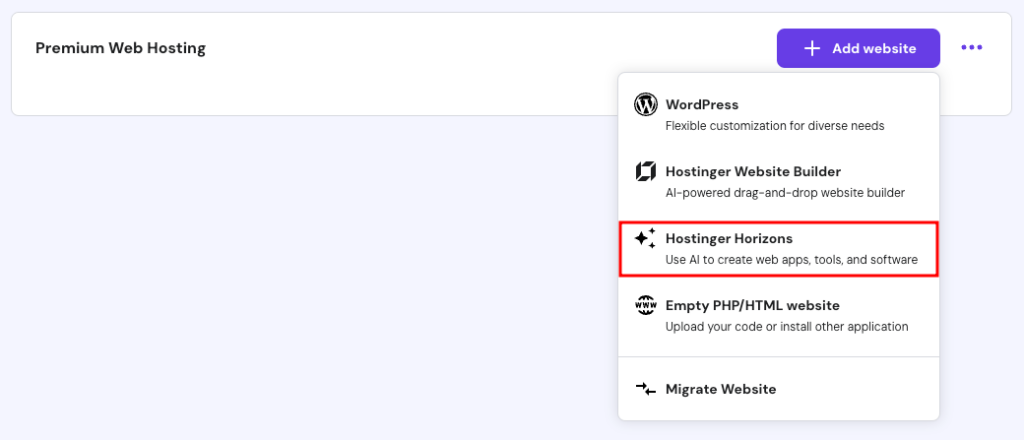
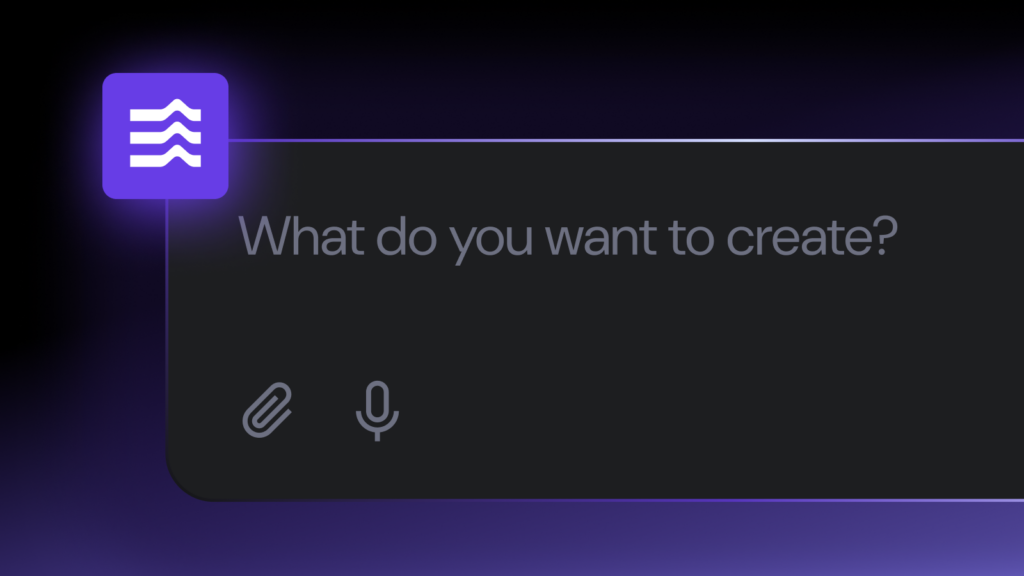
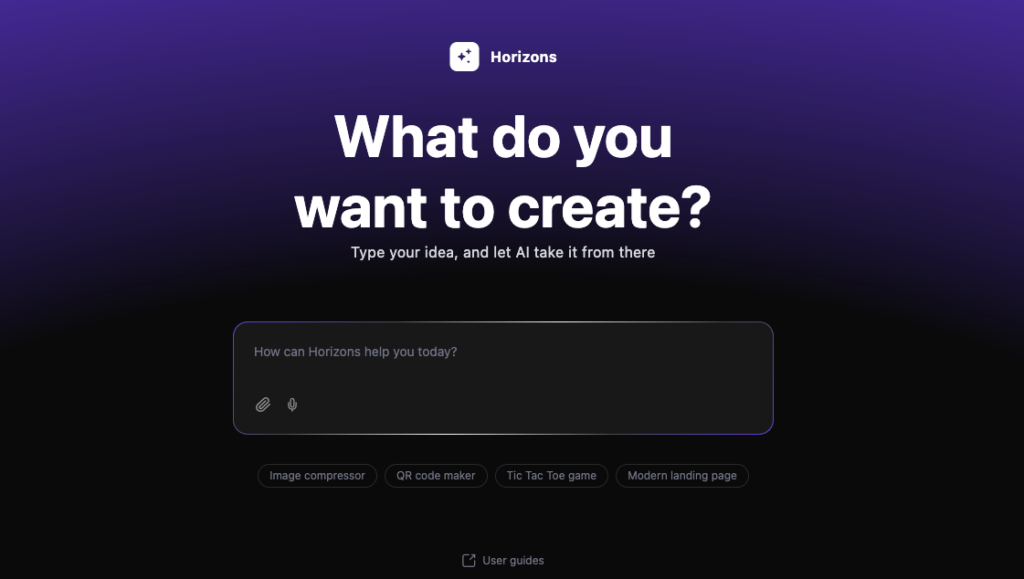
I was presented with a field where I could enter a prompt to describe my web app and its features.
2. Building the web app’s core functionality
To help Hostinger Horizons understand my vision clearly, I wrote a prompt telling the tool about my app’s purpose, core features, and UI preferences:
Create a personal budget-tracking app that allows me to track my income and expenses, set budgets for different categories, and set and track savings goals.
Starting with a simple prompt instead of a long and complex one would help Hostinger Horizons focus on the main request and build a solid foundation for my app.
Here’s the first version of the app the tool came up with after I entered the prompt:
It was still a very basic structure, which was expected since I only entered my first prompt. In the next steps, I began refining it one step at a time – adding more features and customizing the design until I had the best version of my app.
3. Customizing the look and feel
Next, I refined the overall design to create a clean, modern look with a user-friendly interface.
”Pro
To get the best results, focus on refining one section or tab at a time. This way, you can have more control over each change and avoid accidentally messing up other parts of your app.
I entered this prompt to enhance the user experience of my web app, adding the dashboard that I needed:
Improve the interface to be more user-friendly. The app should have a dashboard that provides an overview of income, expenses, budget progress, and savings goals. It should also show a spending status indicator and progress bars for each budget category.
I was expecting the tool to generate only the Dashboard – but instead, it also created separate tabs for Transactions, Budgets, and Savings.
Dashboard
I wanted the dashboard to be more informative. I added a dynamic spending status indicator at the top that would change based on my spending patterns.
Below the top cards, I wanted a visual representation of my Budget overview, and a card for my Savings goals which would display a list of my goals and my progress for each of them.
Here’s the prompt I gave Hostinger Horizons to make this happen:
Refine the dashboard to make it more visual and informative. Include cards at the top that display total income, total expenses, current balance, and a dynamic spending status indicator. Below the cards, add a budget overview section with progress bars for each budget category. Include a section that displays a list of savings goals and progress towards each goal.
Then, I spent some time experimenting with different colors and layouts. I also added more tooltips to make the dashboard more informative. I was satisfied with the results.
Here is the preview after I tried setting a budget for each expense category:
The dashboard was now more visually engaging, giving a clear overview of my financial status.
Transactions
This tab would display a list of my transactions organized by date.
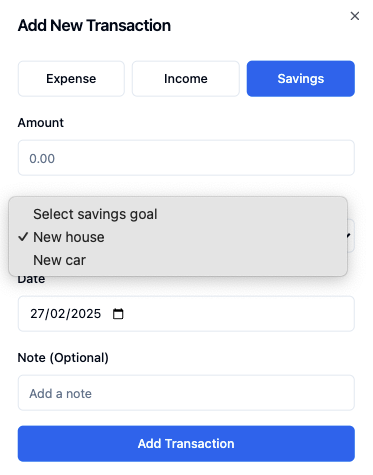
To add a new transaction, I added a button that would open a pop-up window with the following options:
- Buttons to select the type of transaction: Income, Expense, or Savings.
- A dynamic drop-down menu that would display different categories based on the selected transaction type.
- A calendar to select the date of the transaction, restricted to today or past dates only.
- A field to add any notes or details about the transaction.
Here’s the prompt I used to add this functionality:
Refine the Transaction tab to display a list of transactions organized by date. Include an 'Add Transaction' button that triggers a pop-up with fields for transaction type (Income, Expense, Savings), date (today and past dates only), category (dynamically populated based on transaction type), and a Note field.
The first result I got from entering that prompt was a transaction history page with a + Add button to add transactions. This button opened a pop-up with three transaction categories: Income, Expense, and Savings.
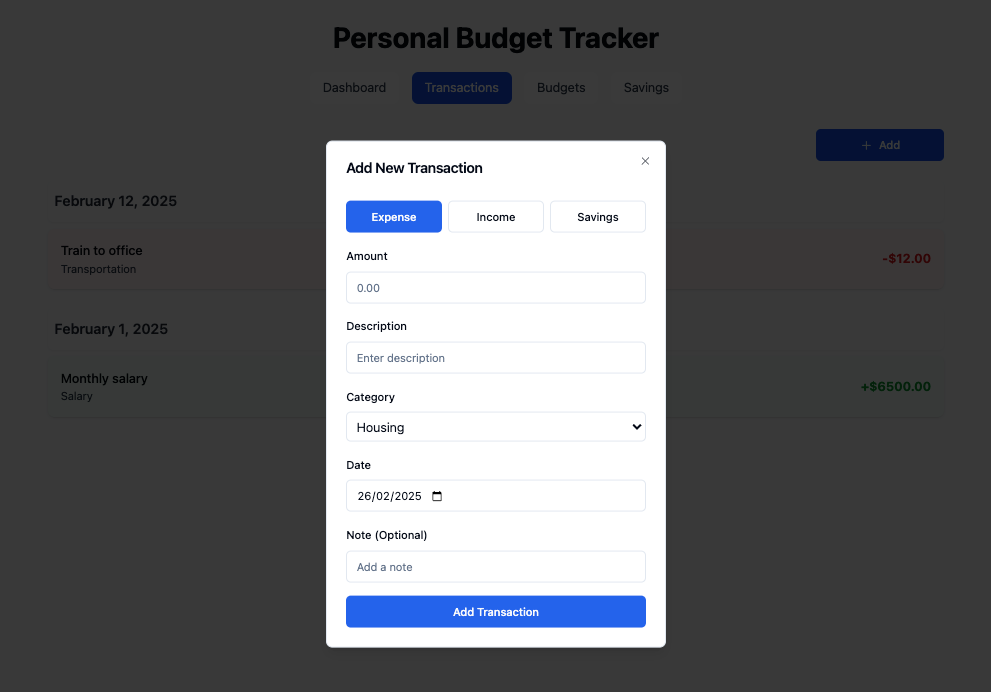
As I tried adding transactions with different dates, they were sorted based on the most recent ones.
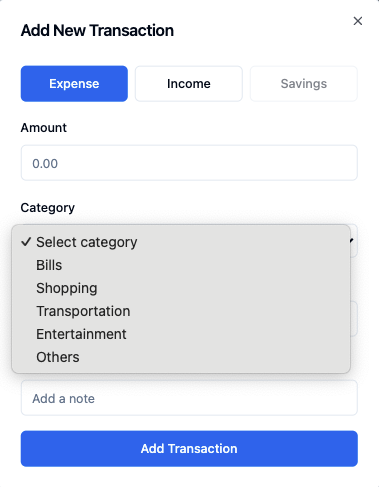
However, the transaction category drop-downs included too many entries that I didn’t need. I wanted to simplify it, so I entered this prompt:
Refine the transaction categories to have fewer choices. For Expense, transaction category drop-down should only include "Bills", "Shopping", "Transportation", "Entertainment", and "Others". For Income, transaction category drop-down should only include "Salary", "Bonuses", and "Interest", For Savings transactions, the category drop-down should only show existing savings goals or be empty if no goals are set. Also, remove the unnecessary 'Description' field from the transaction pop-up.
I was happy to see that the result was much closer to what I envisioned. Now, the drop-down only showed Bills, Shopping, Transportation, Entertainment, and Others. The Savings button would also be greyed out when no goal was set under the corresponding tab.
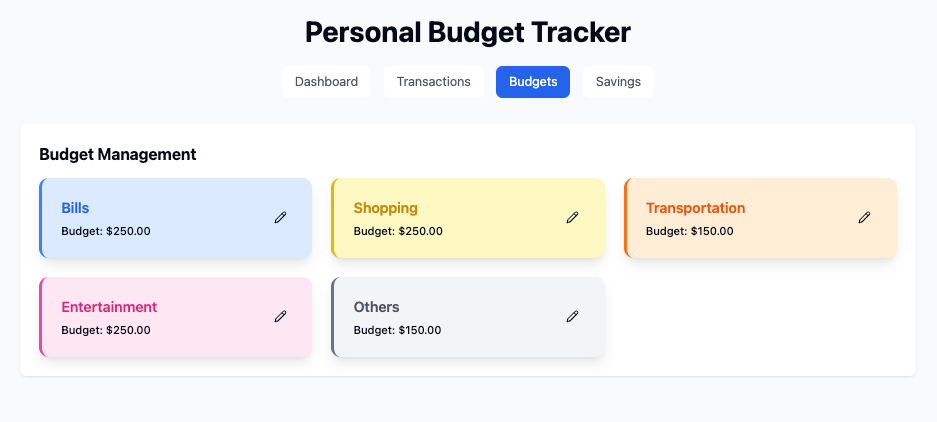
Budgets
The Budgets tab should display cards for every expense category that I have set earlier. Each card would show the category name, the allocated budget amount, and an Edit button to adjust it.
The prompt I entered was quite simple:
Refine the Budgets tab to display cards for each expense category: Bills, Shopping, Transportation, Entertainment, and Others. Color-code the cards based on the existing colors for each expense category. Include an 'Edit' button on each card to adjust the allocated budget amount, with changes reflected on the main dashboard.
Here’s the result I got. Each budget category was shown in its own card and color code, with an edit button to adjust the amount:
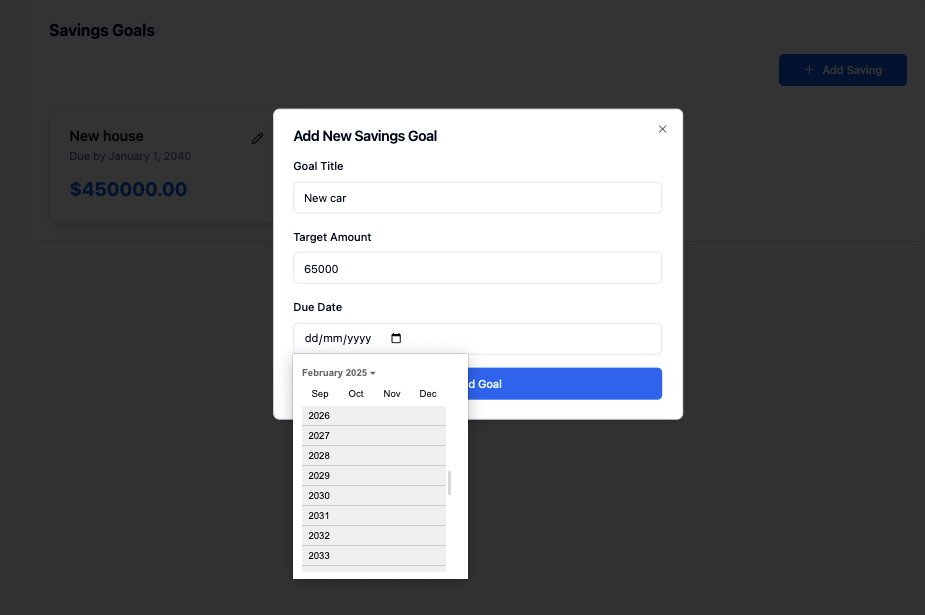
Savings
This tab manages my savings goals and tracks my progress toward achieving them. Here, I could enter my savings goal and the target amount, as well as the target date.
Each entry would have a Delete button and an Edit button to modify the goal, amount, or due date.
Here is the prompt I used to add this functionality:
Refine the Savings tab to include a '+ Add Saving' button that triggers a pop-up with fields for goal title, amount, and due date. Display each savings goal with its title, amount, and due date. Add functionality to edit or delete each savings goal.
Next, I wanted to add logic to this tab so that when I add a savings transaction, it deducts the amount from my total income (like an expense) and adds the amount to the chosen savings goal.
When a savings goal is deleted, all transaction history related to that saving goal should also be deleted. The amount would then be returned to the total income.
So, I entered another prompt in Hostinger Horizons to add this logic:
Under the Transactions tab, transactions for Savings should be treated as expenses, deducting the amount of my Total Income but adding the transaction amount to the selected saving goal.
Here’s the result of my Savings tab when I clicked the +Add Saving button:
The Savings Goals would also be synced to the transaction category drop-down if I wanted to start saving for any of my goals.
Testing and deploying the web app
It was time to test everything out and troubleshoot any errors that might appear.
1. Troubleshooting errors and first iteration
I encountered a few errors as I built my web app. For example, the progress bars on the dashboard didn’t display correctly, and the savings goals didn’t update as expected.
Thankfully, Hostinger Horizons has built-in mechanisms for fixing issues. I could simply inform the tool of the error through the chat or use the Ask to fix button to automatically diagnose and fix it.
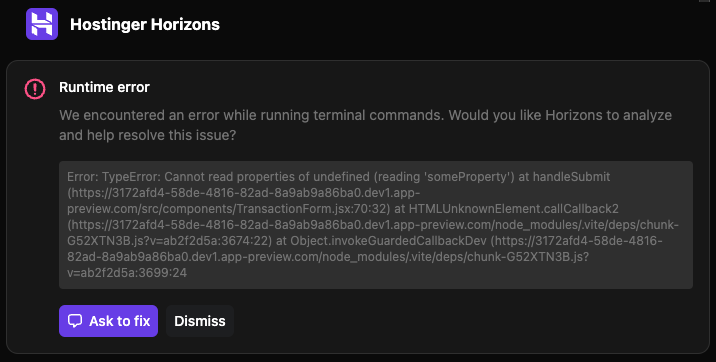
The Revert to this message button also let me roll back to a previous version of my app if an error significantly altered the layout or functionality.

After troubleshooting and testing all the features, I was finally satisfied with my web app. Everything worked as expected, and the app functioned exactly as I wanted it to.
Here’s how my app looked like after I tried all the functionality, including adding budgets, income, and savings goals:
2. Adding a login page
Since my app is a personal budget tracker, I needed a login page to prevent unauthorized access to my financial data.
The page should require a password to access the budget-tracking dashboard. To change the password, there should be a button that triggers a pop-up window. This pop-up would require a PIN known only to me to verify the password change.
To add a login page, I entered this prompt to Hostinger Horizons:
Create a landing page for my app with password protection. The page should have a field to enter a password and a button to change the password. Clicking the button should open a pop-up window that requires a PIN to verify the password change. Set the password to [password] and the PIN to [PIN].
I continued to refine it with additional features, such as adding a logout button, adding an image to the login page, fine-tuning the verification process to improve security, and ensuring that the password-changing logic was secure enough.
3. Deploying the app
Finally, it was time to launch my web app. I clicked the Deploy button at the top right, and within moments, my app was live.
I can update and modify my web app anytime, even after deployment. This means it can adapt to my needs over time. All I need to do is describe the changes I want to make to Hostinger Horizons.
Check out the budget-tracking web app I built here by entering the password:
abc_123
Conclusion
Building a personal budget-tracking web app with Hostinger Horizons was a great experience. I created a tool that fits my needs perfectly and makes managing my finances easier.
What surprised me most was how straightforward the process was. Even with minimal coding knowledge, I could turn my idea into a fully functional, clean-looking app.
Hostinger Horizons makes web app development accessible to anyone, no matter their technical background. It allowed me to focus on improving functionality rather than getting stuck on the technical side of things.
So, if you’ve ever wanted to build your own budget-tracking app but felt intimidated by coding, Hostinger Horizons is the tool for you. Go ahead and build your first web app today!

Faradilla, or Ninda, is a Content Marketing Specialist with a passion for technology, a curiosity for digital marketing trends, and a love for languages. When she's not writing Hostinger tutorials, you can find her learning about life sciences. Follow her on LinkedIn.