How to add a WooCommerce add-to-cart button

The add-to-cart button is a key element for any online store, including those built on WooCommerce.
Without the add-to-cart button, customers won’t be able to check out any items. It’s also important to place it strategically to ease the customers’ buying process and increase sales.
In this guide, we’ll explain three methods to add the WooCommerce add-to-cart button: with a plugin, shortcode, and custom code. We’ll also share the best practices for placing the add-to-cart button and troubleshooting tips in case you encounter errors.
Three ways to add the add-to-cart button in WooCommerce
We will show you three ways to add a WooCommerce add-to-cart button. Feel free to follow the method that best suits your needs and technical expertise.

Using the WooCommerce Custom Add To Cart Button plugin
Activating a plugin is the easiest way to add and customize a WooCommerce add-to-cart button. It’s the best option for beginners because you don’t have to know any coding.
We’ll show you how to include an add-to-cart button using the WooCommerce Custom Add To Cart Button plugin:
- In your WordPress dashboard, navigate to Plugins → Add New.
- Search for WooCommerce Custom Add To Cart Button and click Install Now.
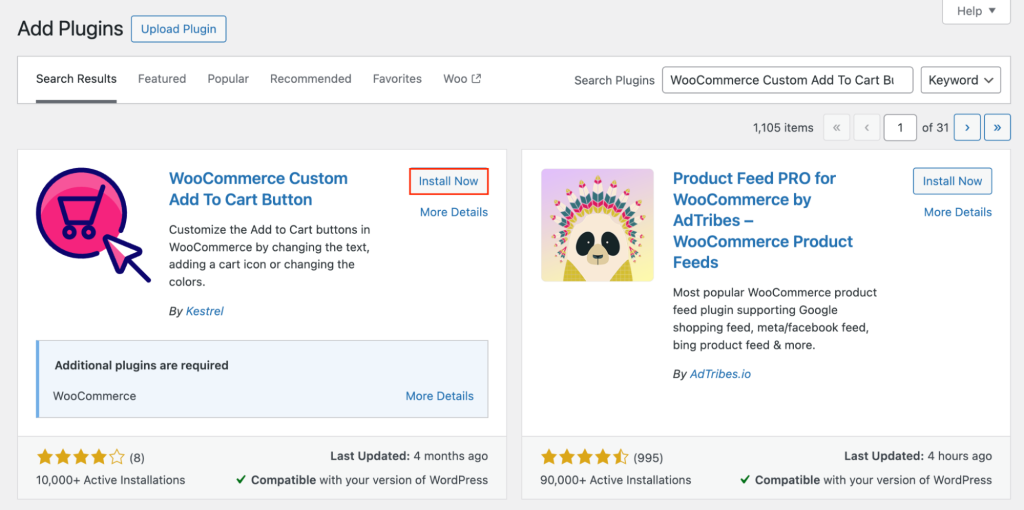
- Hit Activate to enable the plugin on your site.
- Once activated, go to Appearance → Customize → WooCommerce → Add To Cart Buttons. Here, you can configure several settings, such as customizing the button text, adding or hiding the cart icon, and adjusting the button and text color.
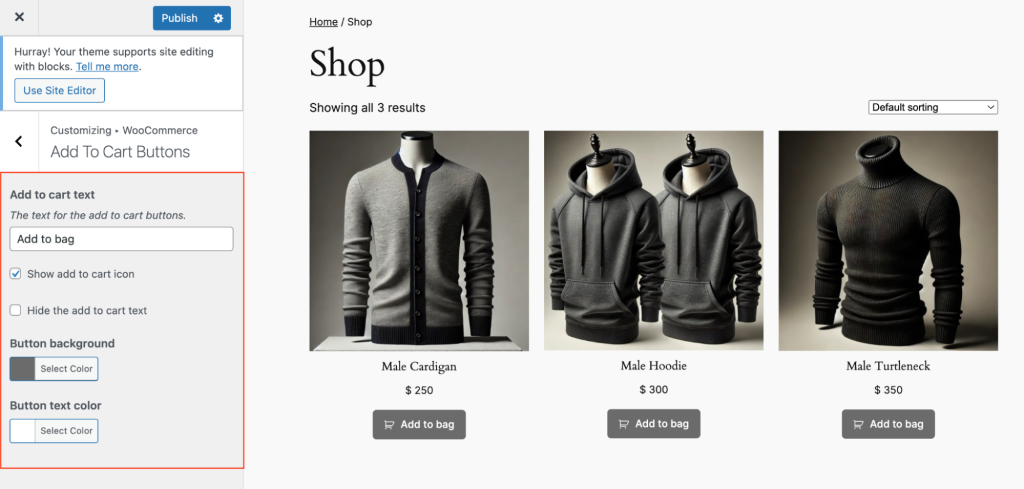
- Click Publish to apply the changes. The customizations will apply to all product and shop pages site-wide.
Visit your eCommerce store and test the new button to make sure it works as expected.
However, some users might find the customization options on this add-to-cart button plugin limiting. In that case, we recommend trying the other two methods.
Using the WooCommerce shortcode
Shortcodes are code snippets that lets you insert dynamic content into posts, pages, or widgets. WooCommerce has a built-in shortcode to add an add-to-cart button for any product in your store.
Here’s how to use the WooCommerce shortcode to add an add-to-cart button:
- Find the product ID by going to Products → All Products. Hover over a product, and you’ll see its ID listed below its name.
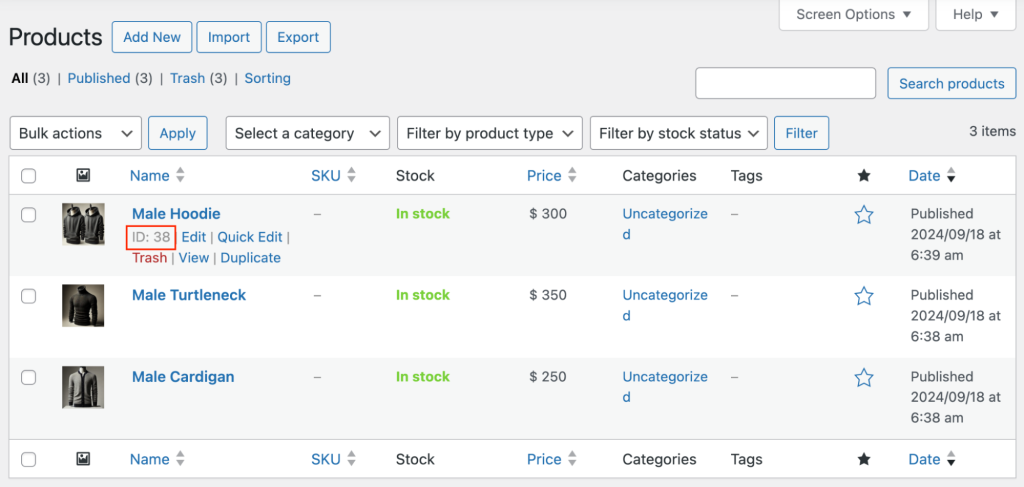
- Use the following shortcode to add an add-to-cart button. Replace PRODUCT_ID with the actual product ID:
[add_to_cart id="PRODUCT_ID"]
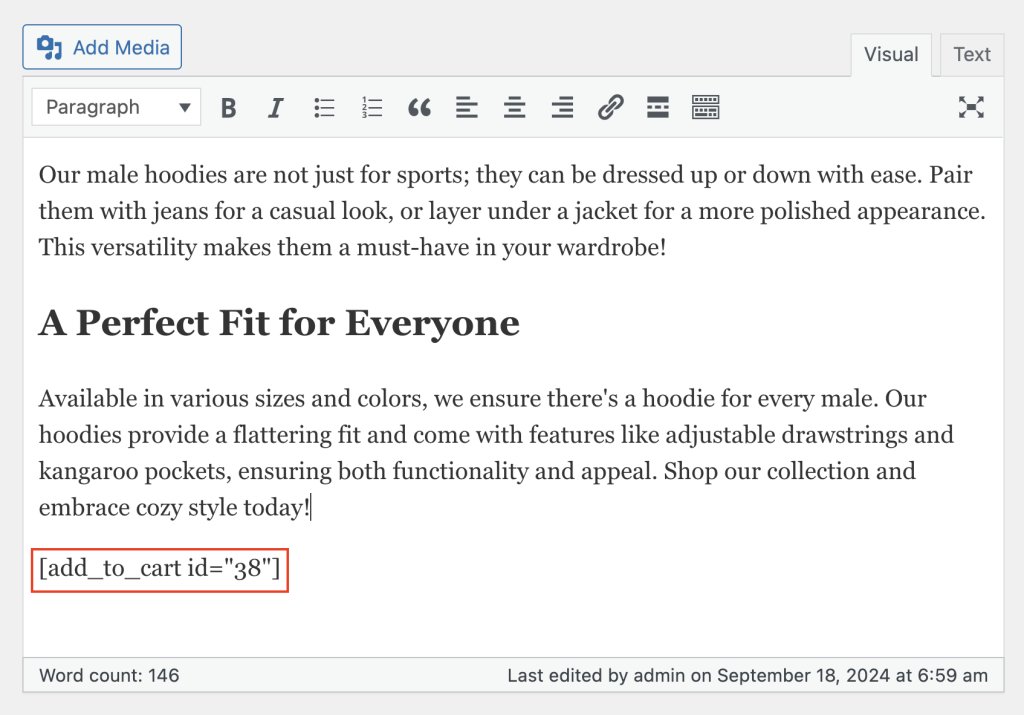
- Insert the shortcode into any post, page, or widget where you want the add-to-cart button to appear. For the WordPress block editor, go to the page or post, add a Shortcode block, and paste the shortcode in it.
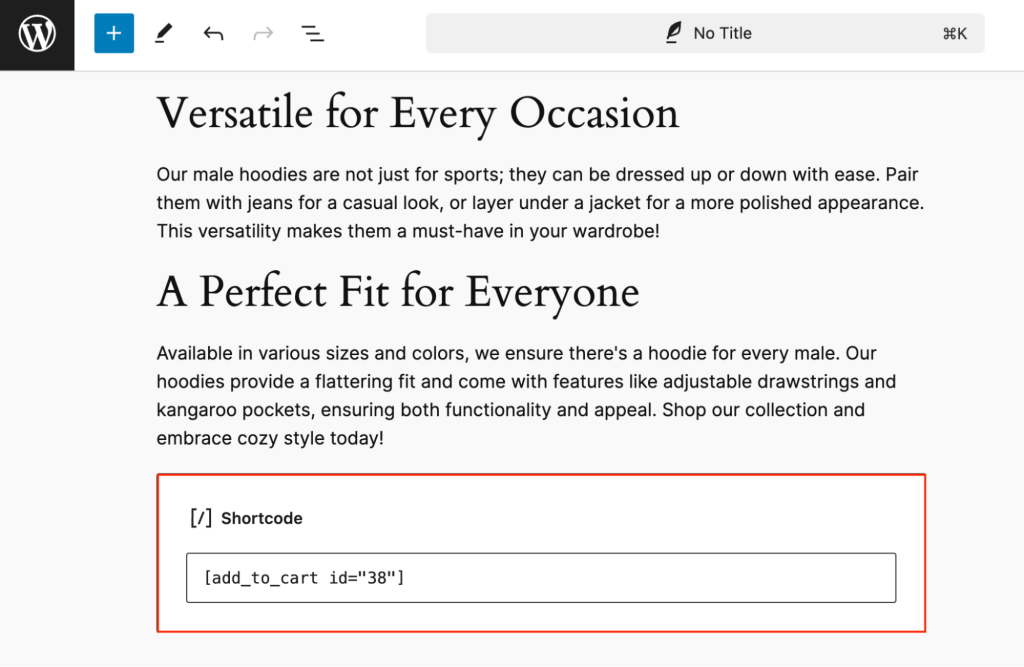
If you use the classic editor, paste the shortcode directly into the visual editor.
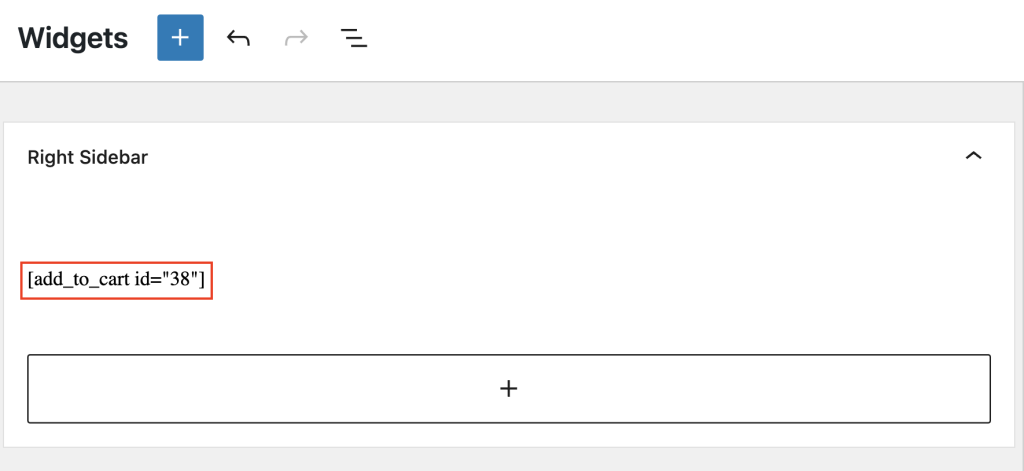
To add the button as a widget, navigate to Appearance → Widgets, choose a Paragraph widget, and paste the shortcode.
Customize the WooCommerce shortcode parameters
To customize the button’s behavior and appearance, you can add the following parameters to the shortcode:
- quantity. Sets the number of items customers can add to the cart when they click the button. For example, to add 2 items of the product ID 25:
[add_to_cart id="25" quantity="2"]
- show_price. Chooses whether to display the product price next to the button. Set show_price to true to show the price or false to hide it.
[add_to_cart id="25" show_price="false"]
- style. Customizes the button’s appearance. You can define styles like border, background-color, or font-size.
[add_to_cart id="25" style="border: 2px solid #ff6600; background-color: #ff6600; color: #fff;"]
- sku. Uses the product’s stock-keeping unit (SKU) instead of a specific product ID.
[add_to_cart sku="SKU123"]
- class. Adds custom CSS classes to the button for advanced styling and functionality. For instance, adding the custom-add-to-cart-button class lets you style the button further in your theme’s CSS file.
[add_to_cart id="25" class="custom-add-to-cart-button"]
- button_text. Customizes the cart button text.
[add_to_cart id="25" button_text="Buy Now!"]
- redirect. Redirects users to a different page, such as the cart or checkout page, after adding the product to the cart. Replace your_store_url with the destination page URL:
[add_to_cart id="25" redirect="true" url="your_store_url"]
Once you’ve applied customizations to the shortcode, publish or update the page or post.
Using code in the theme’s file
If you’re comfortable with editing code, you can tweak your theme’s functions.php file to customize how the add-to-cart button looks and works on your WooCommerce store.
For this method, we suggest using a child theme to prevent losing your theme customizations.
Important! Please be aware that this method requires caution, as incorrect changes can break your site. Be sure to create a WordPress backup before proceeding.
Open the functions.php file based on your theme type:
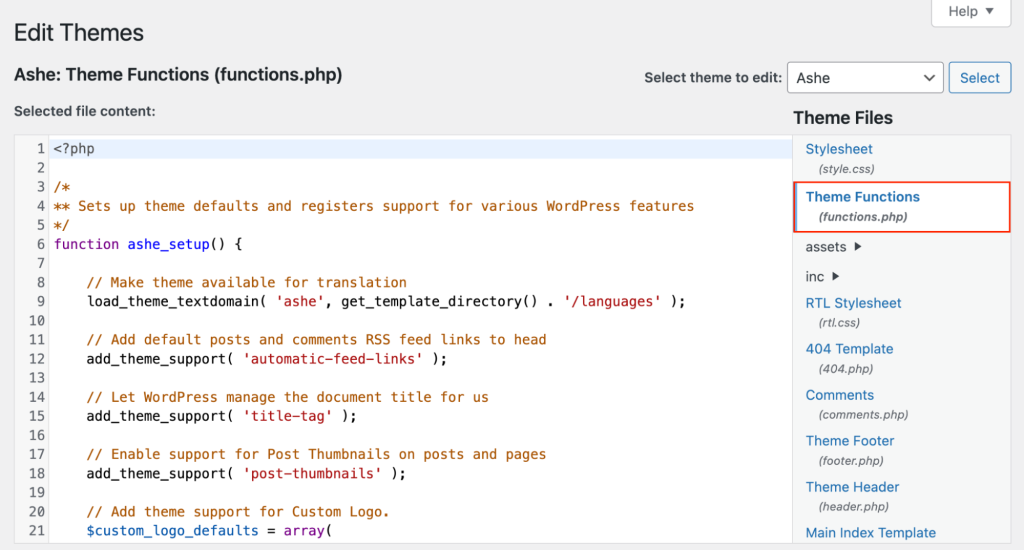
- Via the Theme File Editor menu. If you use a classic theme, head to Appearance → Theme File Editor. From the right-hand sidebar, select the functions.php file of your active theme.
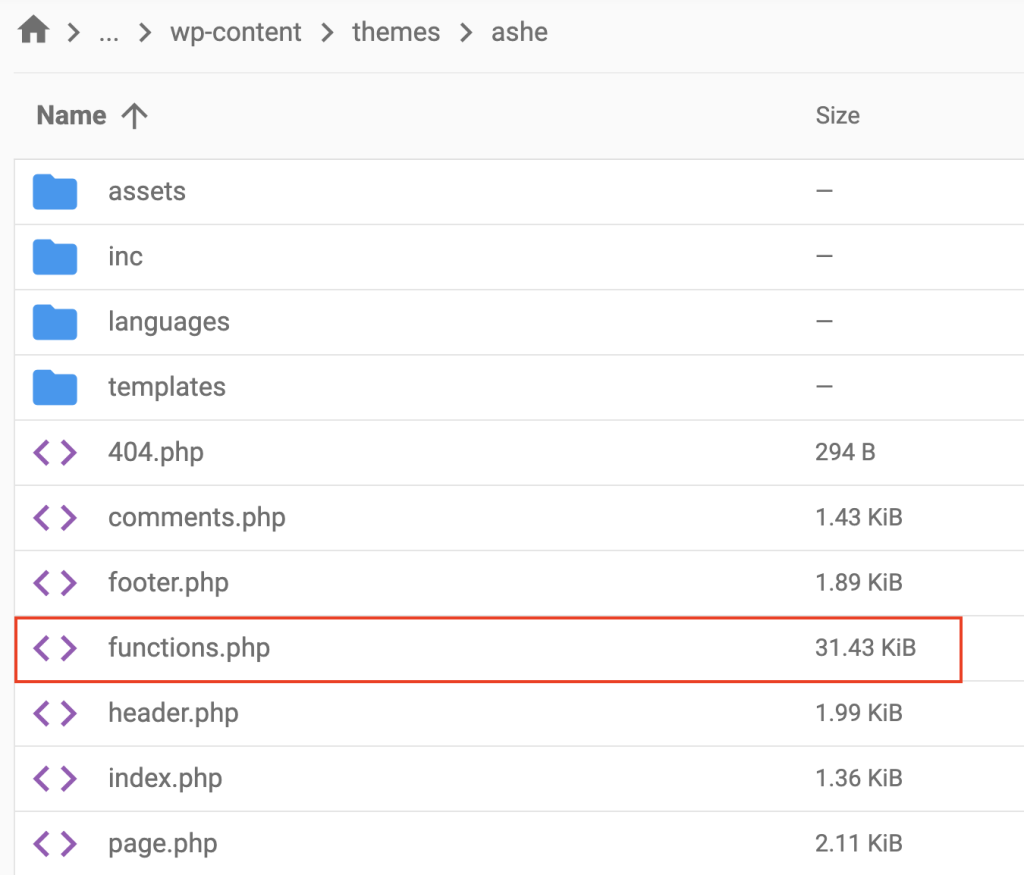
- Via file manager or FTP. For block themes that don’t have the Theme File Editor option, use your hosting provider’s file manager or an FTP client like FileZilla to edit the file. It’s located under public-html/wp-content/themes/your-theme/functions.php.
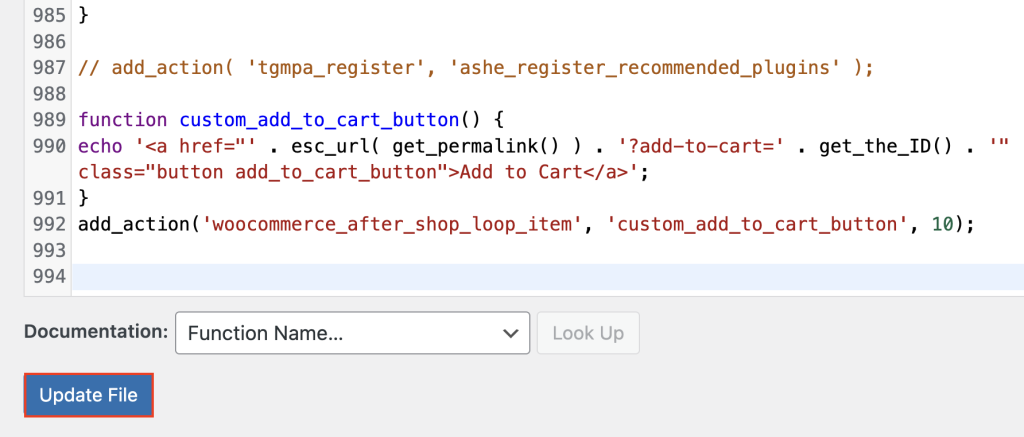
Next, add the following code snippet at the end of the file to display an add-to-cart button after each product on the shop page. You can customize the HTML and CSS to change the button’s style and placement.
function custom_add_to_cart_button() {
echo '<a href="' . esc_url( get_permalink() ) . '?add-to-cart=' . get_the_ID() . '" class="button add_to_cart_button">Add to Cart</a>';
}
add_action('woocommerce_after_shop_loop_item', 'custom_add_to_cart_button', 10);
Finally, save the changes to the functions.php file. If you use the Theme File Editor, click the Update File button. If you’re editing via a file manager or FTP client, save your edits and re-upload the file.
Tips for an effective WooCommerce add-to-cart button
Now that you know how to add a WooCommerce add-to-cart button, let’s talk about how to maximize its potential to boost your sales. Here are our top six tips for an effective add-to-cart button:
Make the add-to-cart button stand out
The add-to-cart button should be easily recognizable to encourage customers to buy products.
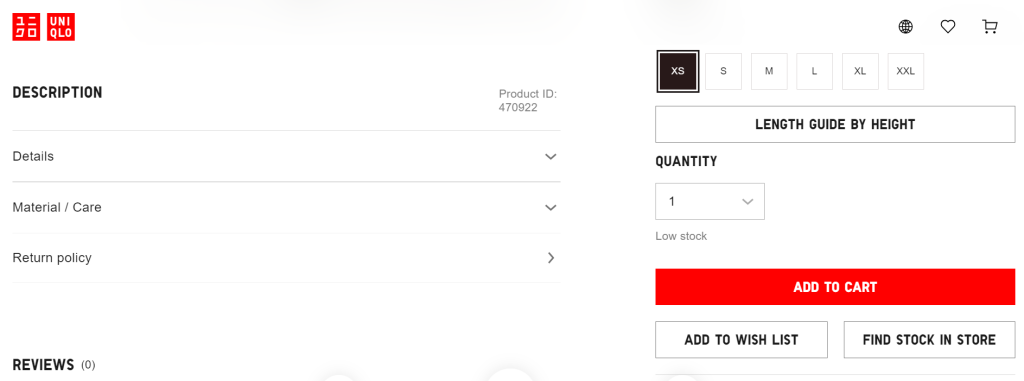
Use a bold, contrasting color that aligns with your brand but stands out from the rest of the page. For instance, if your website uses a predominantly neutral color scheme, a bright, contrasting color like red or green can make the button more noticeable.
Take Uniqlo’s add-to-cart button as an example. The red pops on the predominantly white page while also matching the brand’s color palette.
You should also find a sweet spot when it comes to the add-to-cart button’s size. Make sure it is large enough to be easily clickable but not too large that it takes up too much space.
Place the button strategically
Your WooCommerce add-to-cart button should be visible and easy to access. Ideally, it should be the first element your customers see when they visit a product page.
We recommend placing the add-to-cart button near key elements like the product title, price, and image. If you need to have a detailed product description, consider having a sticky add-to-cart button that stays visible even when users scroll the page.
Write a clear call to action
The text on your add-to-cart button should be simple, clear, and action-driven.
Instead of vague words like Proceed or Continue, use direct language that represents the desired actions, such as Add to Cart or Buy Now.
You can also be creative with the text and personalize it to your target audience. For instance, write Add to Bag for online fashion stores or Order Now for limited-stock items.
Also, consider adding a shopping cart icon next to the text. This way, the add-to-cart button is more intuitive for your customers.
Maintain a consistent design
Make sure that the add-to-cart button’s design aligns with the rest of your site. If a button looks off or out of place, it can confuse customers and make them less likely to click on it.
Use colors and fonts from your brand palette, and make sure that the buttons look the same wherever you place them on your WooCommerce store.
Add interactive elements
Visual feedback boosts the user experience by letting customers know their actions were successful. It makes shopping more intuitive and helps prevent any confusion.
You can implement a subtle animation, like a slight color change, a confirmation pop-up, or a cart icon that updates in real-time when customers add an item to the cart.
That said, keep it simple. You don’t want to overwhelm users with too many animations.
Make sure the button is mobile-responsive
Nearly 80% of shoppers access online stores from mobile devices. So, it’s important that your add-to-cart button functions well on any screen size.
The rule of thumb is to make the button large enough to tap easily. Also, give sufficient space around it to prevent accidental clicks on nearby elements.
Try accessing your online store from devices with different screen sizes to see if the button works perfectly. This will allow you to immediately fix any errors.
How to fix a missing add-to-cart button in WooCommerce
A missing WooCommerce add-to-cart button is an issue that could happen from time to time. Here are some ways to troubleshoot the error:
Check your WooCommerce settings
The add-to-cart button won’t show if your WooCommerce setup is incomplete.
In this case, you should check whether your online store’s currency, shipping options, and payment methods are properly configured.
Refer to our WooCommerce tutorial to ensure you’ve followed all the essential steps.
Check your WooCommerce product data
WooCommerce may hide the add-to-cart button if a product is out of stock or missing any required details like the image, price, product type, stock keeping unit (SKU), and shipping rules.
If this is the case, filling in the missing information for your WooCommerce products might fix the problem. Alternatively, consider removing sold-out products to prevent them from appearing on your pages and searches.
Clear your WordPress cache
Your website cache may be showing an outdated version of your product page without the add-to-cart button.
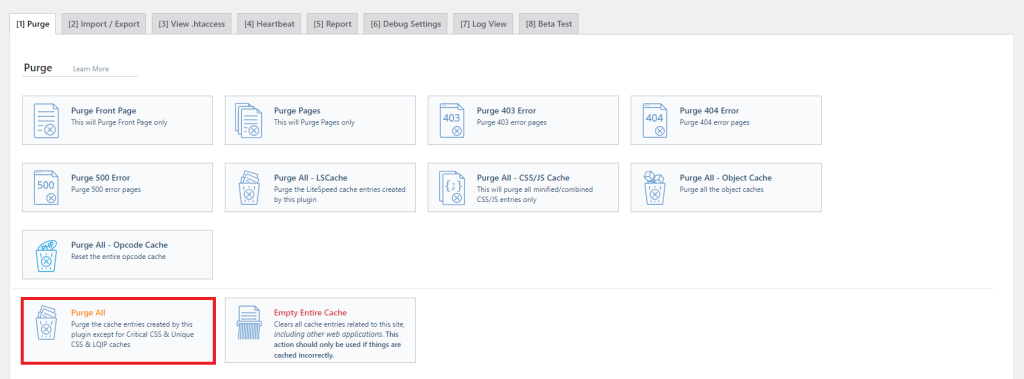
Clearing your WordPress cache using a caching plugin could fix this issue. Here’s how to do it with LiteSpeed Cache:
- Install and activate the plugin from your WordPress admin dashboard.
- Navigate to LiteSpeed Cache → Toolbox.
- The Purge tab will open by default. Choose Purge All to clear the entirety of your website cache.
Run a malware scan on your website
Malware can corrupt or modify WordPress core files, your site’s JavaScript or PHP code, plugins, or themes. This can possibly stop the add-to-cart button from functioning.
Use WordPress security plugins like Wordfence or Sucuri to scan and remove malware from your website files.
You can also consider restoring your website from a backup taken before the malware infection.
Check for any conflicting plugins or themes
Important! We recommend trying this troubleshooting method in a staging environment, as it might affect your live site’s functionality.
Installing multiple WooCommerce plugins lets you build a highly functioning eCommerce site. However, incompatibility between plugins may cause WooCommerce add-to-cart buttons to fail.
To troubleshoot this problem, try deactivating all plugins except WooCommerce and check if the add-to-cart button appears on the live site.
If it does, re-enable plugins one by one to identify the source of the conflict. Then, try updating the plugin in question if it’s outdated. If not, remove it or try to find a replacement.
In case your plugin isn’t causing the issue, try switching to a default WooCommerce theme like Storefront and see if the add-to-cart button appears. If it does, your active theme is most likely causing the error.
If you’d rather not change your WordPress theme, check if the current theme is up-to-date. If it is, try to consult with the theme’s support team to solve the issue.
Conclusion
In this tutorial, you’ve learned how to add a WooCommerce add-to-cart button using three different methods. Each method gives you a different level of control and flexibility, so choose the one that best fits your needs.
Strategically placing an add-to-cart button can really make your customers’ shopping experience smoother and more enjoyable. When that happens, you’ll likely see more sales.
It’s also important to regularly check if your online store’s add-to-cart button is properly functioning so you can fix any issues immediately.
We hope this guide helps you optimize your store’s add-to-cart button and shows you how to troubleshoot any errors if they arise. Good luck!
WooCommerce add-to-cart button FAQ
How do I add a link to the add-to-cart button in WooCommerce?
You can use plugins like WooCommerce Custom Add to Cart Button to easily add a custom link to the button. If you’re comfortable editing code, add the redirect parameter to the [add_to_cart] shortcode, or edit your theme’s functions.php file.
What is the shortcode for the add-to-cart button in WooCommerce?
The shortcode for the add-to-cart button in WooCommerce is [add_to_cart]. The basic syntax is [add_to_cart id=”PRODUCT_ID”], where you should replace PRODUCT_ID with the product’s actual ID number.
How do I edit the WooCommerce cart button?
The WooCommerce Custom Add to Cart Button plugin lets you make simple changes to the button. For more advanced tweaks, add the style and class parameters to the WooCommerce [add_to_cart] shortcode or add custom CSS to your theme’s functions.php file. But remember to create a child theme or back up your site before making changes to its code.

Larassatti Dharma is a Content Writer with 3+ years of experience in the web hosting industry. She’s also a WordPress contributor who loves to share helpful content with others. When she's not writing, Laras enjoys learning foreign languages and traveling. Follow her on LinkedIn

Ariffud is a Technical Content Writer with an educational background in Informatics. He has extensive expertise in Linux and VPS, authoring over 200 articles on server management and web development. Follow him on LinkedIn.